
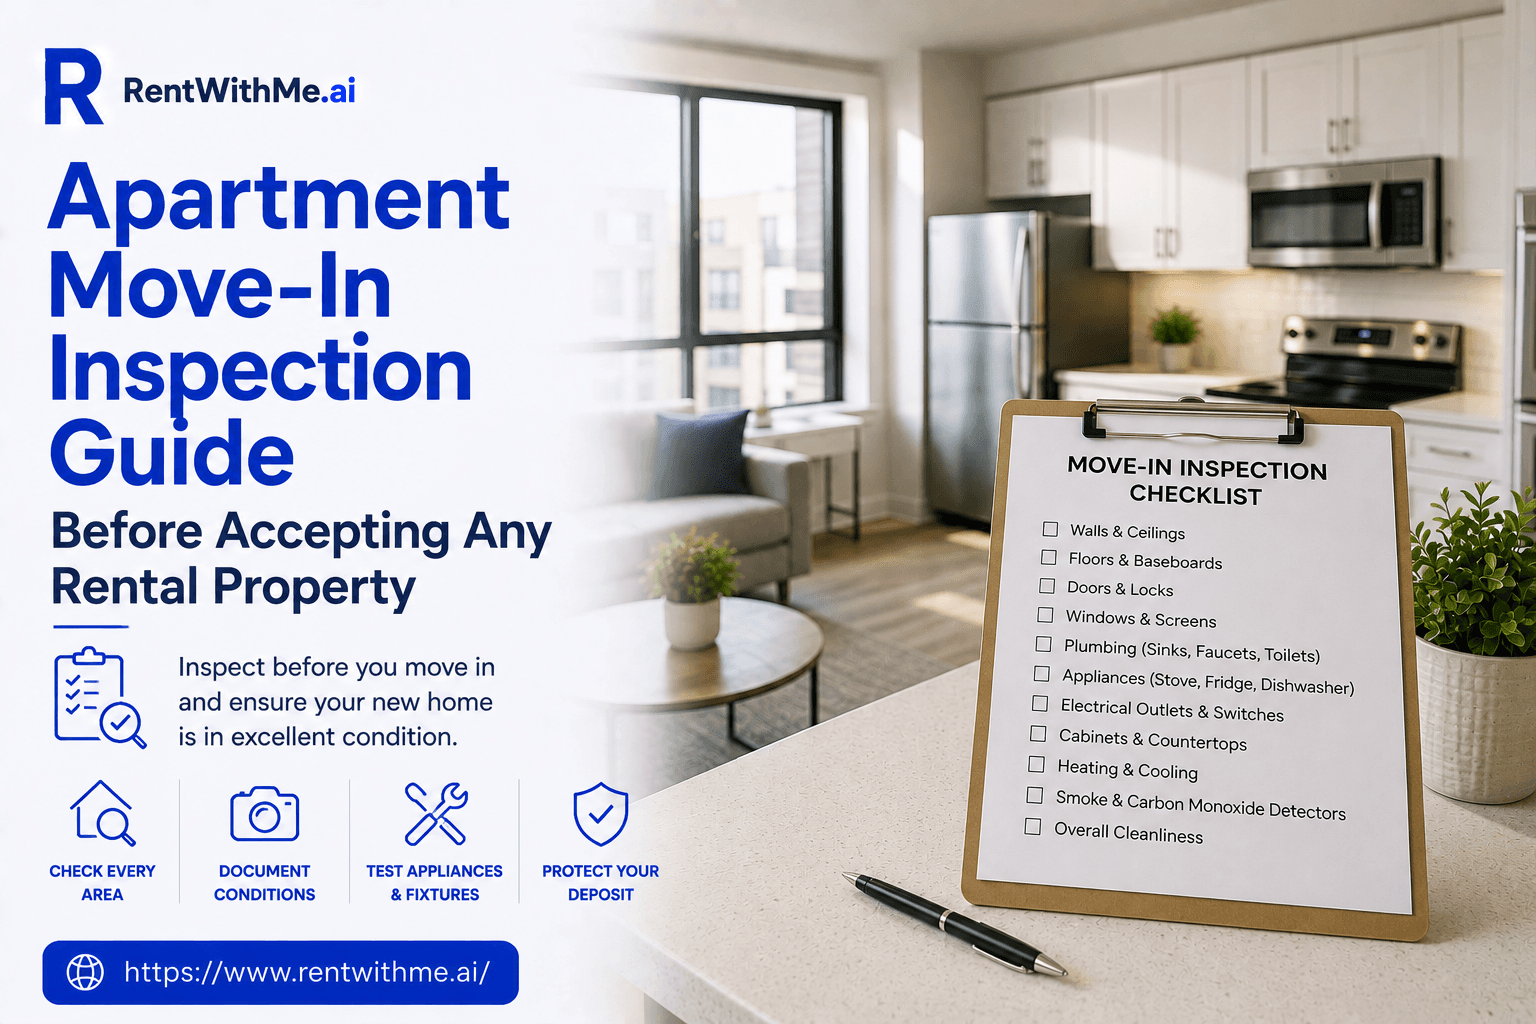
Apartment Move-In Inspection Guide Before Accepting Any Rental Property
Introduction
A move-in inspection is one of the most important steps a renter can take before settling into a new apartment. It gives you a chance to verify the actual condition of the property, document existing problems, and make sure the rental you are accepting matches what you expected.
Many renters become so focused on getting the keys that they overlook small defects, maintenance concerns, or signs of damage. Those issues can become much harder to address once furniture is moved in and daily life begins.
A thorough inspection can also protect you later. If a landlord claims that you caused damage that existed before your tenancy, clear move-in documentation can help establish what the apartment looked like when you arrived.
The inspection is not about searching for reasons to reject every apartment. It is about understanding the property’s condition honestly and making sure important problems are identified before they become your responsibility.
For renters in New York City, this process can be especially valuable because apartments often have long histories, older finishes, previous repairs, and different levels of maintenance. A unit may look attractive during a short showing but reveal very different details when inspected slowly.
The strongest approach is systematic. Check every room, test important systems, document existing conditions, and communicate any concerns clearly before accepting the apartment as ready for occupancy.

Why a Move-In Inspection Matters Before You Accept the Keys
A move-in inspection establishes a clear starting point for the entire rental tenancy. It helps renters and property management understand the apartment’s condition before regular occupancy begins.
Without proper documentation, disagreements about existing damage can become difficult to resolve later. A clear inspection record provides useful evidence when questions arise after the tenancy ends.
Suppose you notice several scratches across the bedroom flooring during your first move-in inspection. If you never photograph or report them, management may later assume you caused them.
The same concern applies to cracked tiles, stained countertops, damaged blinds, or chipped paint. Appliance dents and other visible defects should also be documented before normal occupancy begins.
A few minutes spent documenting conditions at move-in can prevent significant uncertainty during move-out. Clear records make it easier to determine which issues existed before your tenancy began.
The inspection also helps identify maintenance problems that should receive attention before becoming worse. A dripping faucet may appear minor initially, but continued leaking can create larger problems.
A loose lock can create an immediate security concern for anyone occupying the apartment. A slow drain may also indicate a plumbing issue requiring attention from property management.
A refrigerator that does not cool properly can quickly become a significant everyday problem. Discovering this before purchasing groceries gives management time to address the issue promptly.
Testing essential systems before fully moving in helps identify problems while access remains uncomplicated. It also gives management an early opportunity to correct legitimate maintenance concerns.
Think of the Inspection as a Baseline
The inspection establishes what conditions already belong to the apartment before your occupancy begins. Existing stains, scratches, dents, cracks, missing parts, or malfunctions should form that baseline.
You do not need to document every tiny mark throughout the entire apartment. Focus instead on anything a reasonable person could later interpret as noticeable damage.
This creates a fairer and more reliable record for both tenant and landlord. It also helps distinguish preexisting conditions from problems developing during your actual occupancy.
The Difference Between a Rental Tour and a True Move-In Inspection
A rental tour primarily helps you decide whether the apartment suits your housing needs. You may focus on location, bedroom size, natural light, closets, or kitchen layout.
You might also consider whether your furniture will fit comfortably throughout the available space. A move-in inspection serves a different purpose once you have chosen the apartment.
It asks whether everything functions properly and matches the condition you were originally promised. The focus shifts from general appeal toward documented condition and practical functionality.
During a rental tour, renters often spend only a short time inside the apartment. They may not test every faucet, open every cabinet, or inspect every window lock.
They may also overlook ceilings, appliance surfaces, flooring damage, or other less obvious conditions. A proper move-in inspection requires more time, attention, and careful observation throughout the apartment.
You are no longer simply asking whether you could comfortably live in the apartment. Instead, you are determining exactly what condition you are formally accepting at move-in.

Do Not Let an Empty Apartment Create False Confidence
Empty apartments often appear cleaner, larger, and more spacious than they will once fully occupied. Without furniture and personal belongings, closets can seem larger while individual rooms feel more open.
The absence of belongings can also make certain defects easier to overlook during inspection. Your attention may naturally focus on the overall space instead of smaller existing problems.
Take your time and examine individual surfaces rather than viewing each room only broadly. Carefully check corners, look behind doors, open cabinets, and inspect areas surrounding the windows.
These smaller details matter considerably more during the move-in inspection than during your original tour. A careful review helps ensure you understand the apartment’s actual condition before accepting it.

What to Bring to the Inspection
You do not need specialized or professional equipment to complete a thorough move-in inspection. A smartphone can handle most basic testing, photographs, videos, and documentation you will need.
Still, bringing a few simple items can make the entire inspection process easier and organized. These basic tools can help you examine ordinary apartment features and document existing conditions clearly.
Useful items include:
- A fully charged phone for photographs and video.
- A charger or small device for testing outlets.
- A flashlight for dark cabinets and under-sink areas.
- A tape measure if furniture placement still needs confirmation.
- Notes on your phone or a printed inspection checklist.
- A copy of the lease, move-in report, or property condition form if one has been provided.
- Paper towels or tissues for checking moisture around plumbing areas.
- A small coin or object for checking whether surfaces feel unstable or loose.
The goal is not to arrive at the apartment carrying professional inspection equipment or tools. You simply need enough basic items to test ordinary features and create reliable documentation.
Use a Consistent Inspection Order
Choose one starting point and move through the entire apartment in a clear, logical order. This approach makes the inspection easier to manage while reducing the likelihood of overlooking important areas.
For example, begin at the entrance, inspect the living room, and continue into the kitchen. Then move through the bedrooms and bathrooms before finishing with closets or outdoor areas.
Avoid moving randomly between different rooms because important details can easily be missed that way. Following a consistent inspection order helps ensure every relevant part of the apartment receives attention.
A logical order also makes your photographs and other inspection records easier to organize afterward. You can review the documentation room by room without struggling to identify where photographs were taken.

Keep Original Files
Do not rely only on images uploaded to social media, messaging applications, or compressed cloud services. These platforms may reduce image quality or make original inspection details more difficult to review later.
Keep the original photos and videos whenever possible, preserving their quality and useful documentation details. Create a dedicated folder for the apartment so your move-in inspection records remain organized.
You might label the folder using the apartment address and your original move-in date. Inside that folder, organize photographs and videos by room for easier reference and future review.
This simple organization can make it considerably easier to locate important evidence years later. Clear file organization also prevents valuable move-in documentation from becoming lost among unrelated personal photographs.
Create a Written Condition Record
Photographs provide valuable evidence, but written notes can explain conditions that images cannot clearly capture. A brief written description can document functional problems, movement, sounds, or other less visible concerns.
For example:
“Bedroom window lock is loose.”
“Kitchen faucet drips after being turned off.”
“Bathroom sink drains slowly.”
“Two scratches already present near closet entrance.”
These notes can be included in a formal move-in condition report or emailed to management. Keeping them in writing creates another useful record of the apartment’s condition when your tenancy begins.
A written record also confirms that you identified and reported specific conditions at the beginning. This documentation can become particularly useful if questions about those same conditions arise during move-out.

Checking Doors, Locks, Windows, and Entry Security
Start with the apartment entrance and carefully examine the front door and locking system. Open and close the door several times to confirm that it moves smoothly and securely.
The front door should latch properly without requiring unusual pressure, force, or repeated adjustments. Check the main lock carefully and confirm that it operates correctly from inside and outside.
If the apartment door includes a deadbolt, test it several times for proper operation. Make sure every lock engages securely and does not feel unusually loose, stiff, or difficult.
The door should open, close, latch, and lock normally without requiring excessive force or effort. Any noticeable difficulty should be documented and reported during the move-in inspection.
inspect window
Inspect the Door Frame
Look carefully around the door frame for cracks, loose hardware, or visible lock-plate damage. Check whether the door appears properly aligned and closes evenly within the surrounding frame.
A loose strike plate or noticeably damaged frame can affect the security of the entrance. Also inspect any peephole or viewing device installed as part of the apartment door.
Make sure the viewing device provides a clear view and is not blocked or damaged. Any existing damage should be documented during the inspection and reported when appropriate.
Test Every Window
Open, close, and lock each accessible window to confirm that it operates without excessive force. Check carefully whether each lock actually engages and securely holds the window in place.
A window lock may appear functional while failing to engage properly or provide meaningful protection. Look around the window frame and surrounding walls for any visible signs of moisture.
Peeling paint, staining, bubbling material, or discoloration may indicate previous or ongoing water problems nearby. Do not ignore these warning signs simply because the area feels dry during inspection.
Look for Drafts and Damaged Seals
Inspect the edges of each window carefully for damaged seals, visible gaps, or noticeable drafts. Poor seals can affect indoor comfort, outside noise levels, and overall temperature control throughout rooms.
During colder months, significant drafts can make rooms uncomfortable and harder to keep consistently warm. During warmer months, poorly sealed windows can also make effective cooling considerably more difficult.
If the apartment faces a busy street, window quality can significantly influence indoor noise levels. Close the windows and listen carefully to compare the difference between open and closed conditions.
That difference can provide useful insight into how comfortable and quiet the apartment may feel.
Inspecting Walls, Ceilings, Floors, and Signs of Water Damage
Walls and ceilings can reveal important information about the apartment’s condition and maintenance history. Begin by checking carefully for visible cracks, discoloration, repairs, or other unusual surface conditions.
Small cosmetic imperfections may be common in older buildings, but substantial or unusual cracks deserve attention. Look carefully for yellow or brown discoloration appearing across ceilings or upper wall areas.
These marks can indicate previous moisture exposure, while freshly painted patches may deserve closer inspection. Fresh paint may simply reflect cosmetic maintenance, but it could also cover earlier repair work.
Ask management for clarification whenever an area appears unusual or raises reasonable questions during inspection.
Look Up, Not Just Around
Renters often focus mainly on walls and other surfaces positioned around normal eye level. Ceilings are easier to overlook, although they can reveal important signs of previous problems.
Check areas beneath bathrooms, kitchens, roof lines, windows, and exterior-facing walls for visible concerns. Look for bubbling paint, stains, discoloration, or drywall that appears unusually soft or damaged.
Use your phone camera to document areas that are difficult to inspect clearly from below. If the ceiling appears freshly repaired, photograph its current condition during your move-in inspection.
The underlying issue may already be resolved, but keeping a record remains useful for later reference.
Inspect Floors Carefully
Walk slowly through each room and pay attention to how the flooring feels underneath. Check for loose boards, uneven surfaces, cracked tiles, lifted edges, or noticeably soft areas.
Look carefully for existing scratches, stains, burns, chips, or missing sections throughout the flooring. Document these imperfections clearly so their condition at move-in is recorded for future reference.
Pay particular attention to high-traffic areas around entrances, kitchens, closets, hallways, and connecting spaces. Furniture can hide flooring damage during occupancy, making move-in the best time for documentation.
Check Baseboards and Corners
Baseboards can reveal signs of moisture, pest activity, previous damage, or earlier repair work. Look carefully for staining, gaps, damaged materials, loose sections, or repairs that appear unusual.
Inspect corners where walls meet flooring because these areas may reveal leaks or pest entry. Small gaps do not automatically indicate serious problems requiring immediate concern or extensive investigation.
The goal is simply to identify conditions that deserve documentation or reasonable questions before move-in.

Testing Lights, Outlets, Switches, Heating, Cooling, and Ventilation
Walk through the apartment carefully and test every light switch you can reasonably access. If a switch appears to control nothing, ask management what it is intended to operate.
Check all built-in fixtures and confirm that the lights turn on without excessive flickering. A missing bulb is different from a fixture that fails to work properly.
Document any nonworking lights before move-in so their existing condition is clearly recorded.
Test Electrical Outlets
Use a phone charger or another small device to test several accessible electrical outlets. You do not necessarily need to test every receptacle when the apartment contains many.
However, check enough outlets to determine whether the electrical system appears reasonably functional throughout. Pay particular attention to outlets near your expected desk, television, bed, kitchen appliances, and bathroom.
An apartment may contain plenty of outlets while still having inconveniently positioned or nonworking ones. Knowing which outlets function also helps with furniture placement and everyday planning.
Look for Damaged Outlets and Switch Plates
Inspect outlet and switch faceplates carefully for loose, cracked, scorched, or visibly damaged components. Any electrical components showing these conditions should be documented and reported to management.
Do not attempt electrical repairs yourself, especially when an outlet moves as plugs are inserted. Electrical concerns should be handled by qualified personnel rather than treated as simple cosmetic problems.
Understand the Heating System
Identify how the apartment is heated by locating radiators, baseboards, vents, or other heating equipment. Ask management how residents control the temperature and whether individual adjustments are available.
Some buildings provide centralized heating with limited individual control, while others have apartment-specific thermostats. When weather conditions allow, verify that the heating system appears to respond correctly.
If summer conditions prevent reasonable testing, ask management about the system’s operation and maintenance procedures.
Test Cooling Where Available
If the apartment includes central air or built-in cooling equipment, test the system when practical. Listen for unusual noises and confirm that air flows properly through the available vents.
Ask management what cooling equipment residents are responsible for maintaining during their tenancy. If tenants provide window or portable air-conditioning units, inspect whether the intended setup appears practical.
Also confirm that building rules permit your planned installation before purchasing or installing cooling equipment. Reliable cooling can significantly affect everyday comfort during hot and humid NYC summers.
Check Ventilation
Turn on bathroom exhaust fans where available and confirm that they appear to operate normally. Check kitchen ventilation systems or range hoods and listen carefully while they are running.
Weak ventilation can contribute to persistent moisture, cooking odors, and uncomfortable indoor conditions over time. Some apartments rely more heavily on windows or building systems instead of dedicated exhaust fans.
The important point is understanding how moisture and everyday odors are expected to leave the apartment.
Inspecting the Kitchen, Appliances, Cabinets, and Plumbing
The kitchen contains several important systems within a relatively small area, so inspect everything carefully. Begin with the refrigerator by opening its doors and checking the overall interior condition.
Look for broken shelves, damaged drawers, strong odors, excessive ice buildup, or visible leaking. Make sure the refrigerator doors close securely and appear to create an appropriate seal.
If the refrigerator is already operating, confirm that the interior feels appropriately cold during inspection.
Test the Stove and Oven
Turn on each burner according to normal safe operating procedures and confirm proper heating. If the stove uses ignition, verify that each burner ignites correctly without unusual behavior.
Test the oven when practical, and inspect the interior for residue or missing components. If the appliance displays error codes or behaves unusually, document the issue before moving in.
Do not assume someone else will test the appliance after you begin occupying the apartment.
Inspect the Dishwasher
If the apartment includes a dishwasher, inspect its interior condition before using the appliance. Check the racks, seals, and visible filters for damage, debris, or missing components.
Run a short cycle if management permits and there is enough time during inspection. Listen for unusual sounds and check carefully around the appliance for signs of leaking.
A dishwasher that appears new can still have drainage, installation, or connection problems requiring attention.
Examine Cabinets and Drawers
Open every kitchen cabinet and check whether hinges, handles, and doors function properly. Drawers should slide normally without sticking, dropping, or requiring excessive force during ordinary use.
Look beneath shelves for signs of moisture staining, pest activity, or visible physical damage. Pay particular attention to the cabinet beneath the sink, where plumbing leaks commonly become noticeable.
Use a flashlight when necessary and carefully check nearby surfaces for any signs of dampness.
Test the Kitchen Faucet
Run both hot and cold water while checking the faucet’s pressure and normal operation. Move the faucet carefully if it includes a swivel, sprayer, or pull-out function.
While the water runs, inspect underneath the sink and watch pipe connections for dripping. Turn the faucet off afterward and wait briefly because some leaks appear after pressure changes.
Test Kitchen Drainage
Fill the kitchen sink partially, then release the water and observe how quickly it drains. Water should flow away normally without significant delay, backup, or unusual gurgling sounds.
Slow drainage may indicate a developing clog that should be documented and reported before move-in. If a garbage disposal is provided, test it only according to proper operating procedures.
Never place your hand inside a garbage disposal, regardless of whether the appliance appears inactive.
Inspecting the Bathroom, Fixtures, Water Pressure, and Drainage
Bathrooms contain several features where small problems can quickly become significant everyday inconveniences. Begin with the sink by running both hot and cold water and checking pressure.
Observe the drainage and inspect underneath the sink carefully for any visible signs of leaking. Check the vanity and surrounding cabinet for swelling, staining, deterioration, or other moisture-related damage.
A distorted cabinet bottom may indicate previous water exposure that deserves documentation or further clarification.
Test the Toilet
Flush the toilet and confirm that the tank refills and stops running normally afterward. Listen carefully for continued running after the tank should have completed its normal filling cycle.
Look around the toilet base for moisture and gently observe whether the fixture feels unstable. A toilet that rocks, leaks, or continues running should be documented and reported promptly.
Do not attempt repairs yourself when the fixture appears damaged, unstable, or improperly installed.
Test the Shower or Tub
Turn on the shower and check both water pressure and temperature during normal operation. Confirm that hot water arrives within a reasonable period and remains reasonably consistent.
Watch how quickly water drains instead of allowing it to accumulate around your feet. Inspect surrounding walls and corners for damaged grout, missing caulk, staining, or moisture signs.
These areas commonly develop maintenance problems when water repeatedly reaches surfaces that are not properly protected.
Check Shower Doors and Curtains
If the bathroom includes a glass shower enclosure, open and close the door carefully. Confirm that it moves securely and inspect seals, hardware, and other components for visible damage.
For bathtubs, inspect the edge where the tub meets the surrounding wall or enclosure. Failed or deteriorated caulking can allow moisture to reach areas where it should not collect.
Document the existing condition even when the problem appears relatively minor during your initial inspection.
Inspect the Bathroom Ceiling
Bathroom ceilings deserve careful attention because moisture frequently accumulates within these relatively enclosed spaces. Look for peeling paint, discoloration, bubbling surfaces, dark spots, or other signs of moisture.
Turn on the ventilation system when available and confirm that it appears to operate normally. If ventilation depends on windows, check whether those windows open and close properly.
Recurring moisture problems can worsen when ventilation is inadequate and should be discussed with management.
Check Mirrors, Vanities, and Accessories
Inspect bathroom mirrors for cracks and open medicine cabinets to check their overall condition. Check towel bars, toilet paper holders, and other mounted accessories for loose or damaged hardware.
Minor looseness may seem insignificant, but documenting it can prevent confusion if something later falls. Also review available storage because insufficient space can affect how comfortably the bathroom functions daily.
Common Red Flags Renters Often Miss During a Quick Walkthrough
Some apartment problems are immediately obvious, while others can easily disappear beneath initial excitement. Renters may become distracted by natural light, room layout, finishes, or the moving process.
Strong unexplained odors deserve attention because they may affect everyday comfort after moving into the apartment. Heavy air freshener may simply reflect cleaning but can make other persistent odors harder to notice.
Turn off music, fans, and conversation briefly so you can evaluate surrounding noise more accurately. You may notice elevators, hallway doors, mechanical equipment, traffic, or neighboring apartments more clearly.
Noise levels are much easier to understand when you intentionally create a quiet environment.
Fresh Paint in Only One Small Area
Fresh paint is not automatically concerning because apartments commonly receive touch-ups between different tenants. However, an isolated freshly painted area may reasonably deserve closer attention during your inspection.
This is especially relevant near windows, bathrooms, pipe chases, ceilings, or exterior-facing walls. Document the area and ask management about previous repairs if something appears unusual.
If management explains that a leak was repaired, ask whether the underlying problem was resolved. The purpose is simply to understand and document the apartment’s condition accurately before occupancy.
Cabinets or Furniture Blocking Certain Areas
Look behind movable items whenever practical so important surfaces are not accidentally overlooked during inspection. A freestanding cabinet can hide wall damage, while radiator covers may conceal moisture or debris.
Do not disassemble fixtures or move heavy installed items simply to inspect concealed areas. Instead, make sure reasonably accessible portions of the apartment receive appropriate attention during your walkthrough.
The same principle applies to curtains, which should be opened to inspect nearby window frames.
Signs of Recent Repairs
New caulking, patched drywall, replaced flooring sections, or cabinet panels may reflect normal turnover work. These repairs can also indicate areas where an earlier maintenance issue previously occurred.
Document recently repaired areas and ask management whether the related work has been fully completed. A visible repair is not automatically negative when the underlying problem was addressed correctly.
The important consideration is whether the original condition was properly resolved before your tenancy begins.
Multiple Small Problems in the Same Area
One small defect may be insignificant, while several related defects can suggest a larger issue. Look for patterns when multiple warning signs appear within the same section of the apartment.
For example, peeling paint, staining, soft baseboards, and musty odors near one window deserve attention. These combined signs may warrant more investigation than a single minor cosmetic paint chip.
You are not expected to diagnose building problems or determine their underlying technical causes yourself. Your role is identifying situations where professional maintenance should investigate before you become fully settled.
Do Not Let Cosmetic Upgrades Distract You
A renovated kitchen, new flooring, or designer lighting can create an impressive first impression. However, attractive finishes do not guarantee that essential apartment systems are functioning properly.
Plumbing, electrical systems, windows, ventilation, and appliances should still receive careful functional inspection. Evaluate appearance and functionality separately because a beautiful appliance that fails remains a practical problem.
Separate Urgent Problems From Minor Cosmetic Issues
Not every issue discovered during a move-in inspection should necessarily delay your planned occupancy. A minor paint chip is very different from an entrance door that cannot lock securely.
Similarly, a scratched cabinet differs significantly from an active plumbing leak requiring immediate professional attention. Prioritize identified conditions according to safety, habitability, functionality, and the risk of worsening damage.
Urgent issues should be reported promptly, while cosmetic defects should still be carefully documented. This distinction helps both renters and management focus first on conditions requiring immediate attention.
Creating a Clear Record Before Fully Moving In
Before furniture and boxes cover important surfaces, complete one final review of the entire apartment. Walk through every room while comparing your photographs, written notes, and identified existing conditions.
Make sure every significant defect has been clearly documented before your belongings obscure important surfaces. Send relevant information to management through an appropriate written communication channel soon after inspection.
You do not need to send hundreds of individual photographs when management provides a formal process. Follow the established system while preserving your own complete copies and original documentation files.
The important point is establishing an accurate record of the apartment’s condition promptly after move-in.
Preparing for the Next Stage of the Inspection
A complete move-in inspection extends beyond walls, flooring, plumbing, appliances, and basic electrical features. Renters should also examine pests, moisture, safety alarms, storage areas, balconies, and common spaces.
Building access, laundry facilities, trash areas, internet service, intercoms, and package systems also deserve attention. This stage is also where the inspection becomes more closely connected with property management.
Compare the actual apartment with the listing and lease while identifying repairs requiring immediate attention. Create a formal move-in condition record and confirm that management acknowledges any reported problems.
Part 2 will continue with these areas while focusing on easily overlooked move-in details.
Checking for Pests, Mold, Moisture, and Unusual Odors
After checking basic surfaces, plumbing, appliances, and electrical features, inspect less obvious apartment conditions carefully. Pest activity, moisture, and persistent odors can significantly affect everyday comfort after you move in.
Early warning signs may be subtle, especially when the apartment has recently been cleaned. Begin with areas where pests commonly find food, water, warmth, or convenient entry points.
Kitchens and bathrooms deserve particular attention because plumbing penetrations and cabinets create concealed spaces. Look beneath the kitchen sink, around accessible appliances, pipe openings, baseboards, and lower cabinets.
Check bathroom vanities and surrounding plumbing areas for visible evidence requiring further attention or documentation. You are not expected to perform a professional pest inspection during your move-in walkthrough.
The purpose is identifying visible warning signs before belongings and food enter the apartment.
Look for Signs Rather Than Waiting to See a Pest
Visible pests are not required for an apartment to show signs of previous activity. Small droppings, insect remains, unusual debris, damaged packaging, or numerous traps can indicate possible activity.
Pay close attention to openings where plumbing pipes enter walls, floors, or cabinet spaces. These gaps can sometimes provide pathways between apartments, walls, and other areas within buildings.
Ask management directly about anything unusual instead of immediately assuming an active infestation exists. A straightforward question about previous pest treatment can provide helpful context about the apartment’s history.
Inspect Hidden Kitchen Areas Carefully
The kitchen deserves additional attention because available food and water can attract household pests. Open lower cabinets and use a flashlight to inspect corners and other darker areas.
Look underneath the sink and inspect accessible areas around the dishwasher plumbing connection carefully. If safely visible, check the floor and wall around the refrigerator without moving heavy equipment.
Do not pull installed appliances away from walls unless management specifically allows you to do so. Your inspection should always remain safe, reasonable, and non-destructive throughout the entire process.
Pay Attention to Moisture
Moisture can appear in several different forms throughout kitchens, bathrooms, windows, and plumbing areas. Active leaks are obvious, while older water damage may appear through less noticeable surface changes.
Look for staining, peeling paint, swollen cabinetry, deteriorated baseboards, or other unusual discoloration nearby. Recheck areas underneath sinks after water has been running for several minutes during testing.
Some plumbing connections remain dry initially before beginning to drip after continued water use. Inspect around toilets, bathtubs, showers, dishwashers, kitchen sinks, and other water-related fixtures.
Window areas also deserve attention because condensation and rainwater can create recurring moisture problems.
Treat Visible Mold-Like Growth Seriously
If you notice substantial suspicious growth or widespread moisture damage, report the condition to management. Avoid trying to diagnose or clean significant growth yourself before accepting the apartment’s condition.
Different materials can develop discoloration for several reasons, so appearance alone may not provide answers. The underlying source of moisture is more important than simply covering the affected surface.
Painting over a recurring moisture problem does not necessarily address what originally caused the damage. Ask management what caused the condition and what corrective work has already been completed.
Use Your Sense of Smell
Odor can provide surprisingly useful information about an apartment’s condition during your move-in inspection. A musty smell may indicate moisture, while persistent smoke odors may reflect previous smoking.
Cooking, garbage, sewer, or chemical odors can also affect daily comfort despite clean appearances. Keep windows closed during part of your walkthrough to understand the apartment’s normal indoor smell.
Opening every window immediately can make persistent odors considerably harder to recognize during inspection. If strong air fresheners are present, take time to notice whether underlying odors eventually emerge.
The fragrance may be completely harmless, but checking the apartment’s natural smell remains worthwhile.
Testing Smoke Detectors, Carbon Monoxide Alarms, and Safety Features
Safety equipment should always receive proper attention rather than being treated as a cosmetic detail. Identify smoke and carbon monoxide alarms and verify that required devices appear to be present.
Never remove, disable, paint over, or otherwise modify installed safety equipment within the apartment. Notify management immediately when a device appears damaged, disconnected, missing, or clearly nonfunctional.
Use only the manufacturer’s intended testing function where appropriate instead of attempting electrical modifications yourself.
Check the Apartment’s Exit Path
Stand inside the apartment and consider how you would safely leave during an emergency. The primary entrance should remain accessible, and doors should open properly without unusual difficulty.
Hallways and exit paths should not require navigating around unnecessary or potentially dangerous obstacles. If another legally required means of egress exists, avoid blocking it with furniture or storage.
Ask management for clarification whenever you do not understand how a safety feature should function.
Inspect Window Guards Where Relevant
NYC renters with young children should pay particular attention to applicable window safety requirements. Where window guards are required or requested, confirm they are properly installed and securely positioned.
Do not assume that an ordinary window screen provides the same protection as a window guard. If any window appears unsafe, communicate the concern to building management as soon as possible.
Safety should always take priority over convenience when completing the apartment move-in process.
Understand Fire Escape Access
Some NYC apartments have access to exterior fire escapes.
If yours does, understand which window or opening provides access.
Do not permanently block that route with large furniture.
Never treat a fire escape as ordinary storage space simply because neighboring residents appear to do so.
The apartment layout should allow required emergency access to remain functional.
Inspecting Closets, Storage Areas, Balconies, and Outdoor Spaces
Closets are easy to overlook because renters often focus mainly on available storage space. Open every closet door and carefully inspect the ceiling, walls, shelving, and flooring.
Closets near bathrooms, plumbing lines, or exterior walls may reveal hidden moisture conditions. Look carefully for staining, damaged surfaces, loose materials, or other unusual visible conditions.
Also confirm that all installed shelving appears secure and properly supported before adding belongings. A shelf that already feels loose should be documented before storing clothing or boxes.
Test Closet Doors and Hardware
Sliding closet doors should move smoothly along their tracks without excessive resistance or sticking. Hinged doors should also open and close properly without scraping heavily against surrounding surfaces.
Check handles, knobs, hinges, tracks, and other visible hardware for damage or missing components. Document broken or missing hardware as part of your move-in condition record.
These details may not determine whether you accept the apartment, but they still matter. Small existing defects are exactly the types of conditions renters may forget years later.
Clarify Storage Rights
If the rental includes a basement cage, storage locker, bicycle room, or another area, verify exactly what is included. Do not rely entirely on what you remember from the rental listing.
Ask whether the storage space is assigned, shared, included with rent, or separately charged. Inspect the actual storage area whenever possible before relying on it for personal belongings.
Check general accessibility, physical condition, and security before placing valuable belongings inside the space. Understanding storage rules beforehand can prevent confusion or disagreements later during the tenancy.
Inspect Balconies and Terraces Carefully
A private balcony can add considerable value, but it also creates another area requiring inspection. Check the walking surface, railing, doorway, threshold, and any visible drainage areas carefully.
Do not lean heavily against railings simply to determine whether they feel secure. If anything appears loose, damaged, or unsafe, stop testing and report the condition.
Open and close the balcony door, then confirm that the locking mechanism works properly. Inspect nearby interior surfaces for evidence of water entering during previous rain or storms.
Ask About Outdoor Space Rules
Private outdoor space does not necessarily mean tenants have completely unrestricted use of it. Buildings may regulate grills, furniture, planters, coverings, storage, noise, or other outdoor activities.
Ask about relevant restrictions before purchasing furniture or making plans for the outdoor area. Also confirm who is responsible for maintenance, cleaning, and any required seasonal care.
Understanding these responsibilities early can prevent disagreements after you have already invested in the space.
Reviewing Hallways, Elevators, and Common Areas
The apartment itself represents only one part of your overall daily rental experience. You will regularly use entrances, hallways, elevators, stairs, mail areas, trash facilities, and shared spaces.
Spend several minutes observing these common areas carefully before completing your move-in inspection. Their overall condition can provide useful clues about how shared building areas are maintained.
One burned-out hallway light does not necessarily mean the property is poorly managed. However, repeated broken fixtures, debris, unresolved damage, or neglected spaces deserve closer attention.
Test the Building Entry System
Confirm exactly how residents enter the building and access their individual apartments each day. You may receive a physical key, electronic fob, mobile credential, access code, or combination.
Make sure your assigned entry method works correctly before the leasing representative leaves the property. If multiple doors or gates exist, test the complete route from street to apartment.
A key that opens your apartment but not the main building entrance creates unnecessary problems.
Check the Intercom or Buzzer
If the building uses an intercom system, ask management to explain how it operates. Some systems connect directly with the apartment, while others connect through a mobile phone.
Test the system when practical and confirm that visitor audio and door-release functions work properly. If registration requires your phone number, make sure management has entered the correct information.
Inspect Elevators
If you depend on an elevator, observe whether it generally operates reliably and reaches your floor. Also determine whether the building has multiple elevators or relies on only one.
Ask about move-in procedures because many properties require tenants to reserve an elevator beforehand. Buildings may also establish moving hours, insurance requirements, deposits, or protective padding procedures.
Knowing these rules before moving day can prevent scheduling problems, delays, and unexpected moving costs.
Locate the Stairs
Even when your building has elevators, you should know where the stairways are located. You may need them during emergencies, maintenance periods, elevator outages, or service interruptions.
Walk the stair route when appropriate and understand how the stairwell doors operate. Do not assume every stairwell entrance or exit functions exactly as you expect.
Inspecting Laundry Facilities
If laundry access influenced your rental decision, confirm what the advertised feature actually includes. There is a major difference between in-unit laundry, floor-based machines, and shared basement facilities.
Visit the actual laundry area instead of relying only on listing descriptions or photographs. Consider the number of available machines compared with the approximate size of the building.
Ask how residents pay for laundry because buildings may use cards, mobile applications, or other systems.
Check Laundry Hours and Access
Laundry facilities may not always remain available to residents around the clock. Ask whether operating hours apply and whether entry requires a separate key, fob, or credential.
Also determine whether the laundry area is accessible indoors or requires going outside. That difference may seem minor during daylight but matter during winter or late evenings.
Review Trash and Recycling Arrangements
Find out exactly where residents are expected to take ordinary garbage and recyclable materials. Some buildings provide floor-based disposal areas, while others use basements, courtyards, or outdoor locations.
Ask specifically about procedures for disposing of furniture and other large household items. Do not assume bulky belongings can simply be placed beside ordinary building trash.
Building policies and municipal requirements can determine how oversized items must be handled appropriately.
Check for Persistent Common-Area Odors
Walk slowly through hallways and areas located near garbage, laundry, or building service rooms. Strong odors in common spaces can sometimes travel into nearby apartments and affect daily comfort.
If your unit is close to garbage rooms, restaurants, or exhaust systems, consider that location carefully. Visit at different times when possible because certain odors may become stronger during business hours.
Reviewing Shared Amenities
If the building advertises a gym, roof deck, lounge, coworking area, bicycle room, parking, or other amenities, inspect them directly. Do not evaluate important amenities only through listing photographs.
Confirm that the facilities currently exist and remain accessible under the terms originally presented. Ask whether separate amenity fees, restrictions, schedules, or other additional requirements currently apply.
Impressive amenities may provide less practical value when access is limited or requires additional charges.
Verify Reservation Requirements
Some building amenities may require advance booking, guest limits, or scheduled access periods. A roof terrace might restrict guests, while coworking or lounge areas may require reservations.
Ask how the reservation system works before treating those facilities as everyday conveniences. The difference between being available in the building and easily accessible can be significant.
Verifying Utilities Before Moving In
A beautiful apartment becomes difficult to enjoy when essential utilities are not properly ready. Confirm which services are included with rent and which accounts you must establish yourself.
Electricity, gas, internet, and other utilities may require action before your actual move-in date. Do not wait until moving day to discover that an account requires advance activation.
Ask management which services need transfer into your name and when that should happen. If utilities are already active, verify basic functionality during the inspection whenever practical.
Understand Who Pays for What
Utility responsibility should match the terms described within your signed rental agreement. Ask questions whenever listing descriptions, verbal explanations, and lease provisions seem inconsistent or unclear.
For example, “heat included” does not necessarily mean every energy-related expense is covered. Building-provided heat may be included while tenants separately pay electricity for air conditioning.
Understanding the exact arrangement allows you to estimate your monthly housing expenses more accurately.
Check Internet Availability
Internet service has become essential for many renters, particularly those who regularly work remotely. Ask which internet providers currently serve the building and your specific apartment.
Do not assume every provider serving the surrounding neighborhood can connect service to your exact unit. If high-speed internet matters professionally, verify availability directly with the provider before depending on it.
Look for existing cable, fiber, or other connection points without making unauthorized modifications. Follow building procedures before installing new wiring or altering walls for internet service.
Consider Mobile Reception
Walk through the apartment with your phone and observe reception in several important rooms. Check the bedroom, living room, kitchen, and any area where you expect to work.
Some buildings offer excellent reception outside while certain interior apartments receive noticeably weaker service. Wi-Fi calling may help after internet installation, but understanding reception beforehand supports better planning.
Understand Package Delivery
Package handling has become an important part of everyday apartment living for many renters. Ask where deliveries are placed and how residents are notified when packages arrive.
Some buildings have staffed lobbies, while others use package rooms, lockers, vestibules, or apartment delivery. Ask about oversized packages and any procedures that apply to large or valuable deliveries.
If you order frequently, package handling may affect daily convenience more than occasional amenities.
Verify Mailbox Access
Locate your assigned mailbox and confirm how you are expected to access it. Check that the mailbox door closes securely and that any lock functions correctly.
Ask when your name will be added if the building uses resident labels. Incorrect mailbox assignments can create unnecessary confusion during the first weeks after moving.
Report mailbox problems promptly rather than waiting until important mail has already gone missing.
Comparing the Actual Apartment With the Listing and Lease
After inspecting the apartment and building systems, compare everything with what was originally represented. Marketing language can sometimes be broad, while the written lease carries much greater importance.
Check whether appliances, storage, parking, outdoor areas, and other expected features are actually included. If something significant differs, address the discrepancy before assuming it will resolve itself later.
Verify the Exact Apartment
This may sound obvious, but verification matters within buildings containing several similar apartment layouts. Confirm that the unit you inspect matches the address and apartment designation in your lease.
Check the correct floor, apartment number, and other identifying information before completing documentation. A model apartment may have different finishes, views, appliances, or condition than your rental.
Never use a model unit inspection as documentation for the apartment you will actually occupy.
Check Included Appliances
Compare the actual apartment with your lease and any written representations made during renting. If appliances were promised, confirm that each one is physically present inside the apartment.
Check dishwashers, microwaves, cooling systems, washers, dryers, or other specifically included equipment. Confirm that supplied appliances appear functional rather than assuming installation means proper operation.
If something will be installed later, obtain written confirmation of that arrangement when appropriate.
Verify Parking and Storage
Parking deserves careful verification when its availability significantly influenced your decision to rent. Confirm whether a specific space is assigned and whether parking costs are included.
Ask about garage access, guest parking, vehicle restrictions, and any additional parking-related requirements. Apply the same level of verification to storage spaces included with the apartment.
A casual statement about available storage does not necessarily guarantee a dedicated tenant storage area.
Review Furniture in Furnished Rentals
Furnished apartments require additional documentation because supplied furniture remains part of the rental property. Photograph each included item and note existing scratches, stains, broken components, or missing pieces.
If management provides a furniture inventory, compare it directly with what is actually present. Identify missing or damaged pieces immediately instead of waiting until later during the tenancy.
Otherwise, disagreements may develop about whether you damaged, removed, or lost supplied furniture.
Creating a Detailed Move-In Condition Report
A move-in condition report turns your physical inspection into an organized and useful written record. The report should identify the apartment, inspection date, and important conditions within each area.
Keep descriptions factual and specific rather than using exaggerated or emotional language about conditions. Instead of writing “terrible damaged floor,” describe where visible scratches or marks actually appear.
Specific descriptions make the condition easier for both tenants and management to understand later.
Organize the Report by Room
A room-by-room structure provides a simple and practical format for documenting apartment conditions. Use sections covering the entrance, living room, kitchen, bedrooms, bathrooms, closets, and outdoor areas.
Within each section, identify existing damage and any features that are not functioning correctly. Avoid unnecessary commentary because the purpose is establishing an accurate condition baseline.
Attach photographs when appropriate or reference the corresponding images stored within your inspection folder.
Separate Condition From Repair Requests
Not every condition documented during move-in requires management to complete a repair. A small existing floor scratch may need documentation without requiring any immediate corrective action.
A leaking sink, however, requires attention because it can worsen and create additional damage. Separating existing conditions from repair requests helps management understand exactly what response you expect.
This approach also prevents urgent maintenance issues from becoming buried beneath minor cosmetic documentation.
Submit the Report Promptly
Do not complete your move-in inspection and leave the documentation unfinished for several months. Send the relevant condition report to management as soon as reasonably possible after inspection.
Use the property’s official reporting process whenever management provides a specific method for documentation. This might include a resident portal, email address, inspection form, or another approved system.
Keep your own copy and save any confirmation showing that management received your report.
Reporting Repairs Before Fully Moving In
Whenever possible, report important repairs before furniture and moving boxes fill the entire apartment. Maintenance workers can access affected areas much more easily before your belongings occupy rooms.
Early reporting also reduces uncertainty about whether a problem existed before normal occupancy began. Prioritize concerns affecting safety, security, water, electricity, plumbing, heating, appliances, or essential functionality.
Minor cosmetic conditions can generally be documented and addressed separately from more important maintenance requests.
Prioritizing Urgent Repairs Versus Cosmetic Issues
Not every repair request deserves the same level of urgency or immediate management attention. A practical approach is dividing identified conditions into categories based on their likely importance.
| PriorityExamplesTypical Approach | ||
|---|---|---|
| Urgent | Unsafe lock, active significant leak, serious electrical concern, essential service problem | Report immediately and request prompt attention |
| Important | Nonworking appliance supplied with the unit, slow drainage, damaged window hardware | Report promptly and arrange repair |
| Minor | Loose cabinet handle, damaged blind, small fixture issue | Document and request routine maintenance |
| Cosmetic | Existing scratches, paint marks, small dents | Document clearly even if no repair is requested |
This framework is not intended to create a formal legal classification of apartment defects. It simply helps communicate priorities clearly while keeping serious concerns separate from cosmetic observations.
Do Not Attempt Unsafe Repairs Yourself
Moving into a new apartment can create pressure to solve small problems as quickly as possible. Resist attempting electrical, plumbing, gas, structural, or other specialized repairs without proper expertise.
Report those conditions to management so qualified personnel can evaluate and address them appropriately. Unauthorized repairs can create safety risks and potentially complicate responsibility when additional damage occurs.
Even apparently simple problems can involve hidden systems that require professional knowledge and equipment.
Questions to Ask Management Before Accepting the Apartment
The final stage of this inspection includes gathering information that visual observation cannot provide. Ask how maintenance requests should be submitted and how emergency repairs are handled.
Confirm who residents should contact outside normal office hours when urgent building problems occur. Ask how building entry, packages, laundry, trash areas, and shared amenities operate.
Clarify unresolved repair promises and confirm which utility accounts you need to establish yourself. If the building has moving procedures, obtain those requirements before your movers arrive.
Get Important Promises in Writing
If management agrees to complete a repair after move-in, document that commitment in writing. A simple confirmation can reduce confusion about what was discussed and what should happen next.
Include the identified issue and the expected next step management agreed to take. You do not need formal legal documentation for every minor cosmetic or hardware concern.
However, written clarity becomes valuable when significant conditions influenced your decision to accept the apartment.
Ask About Maintenance Response Procedures
Knowing how to request maintenance is almost as important as knowing who manages the property. Some buildings rely on resident portals, while others use email, telephone, or onsite staff.
Understand the standard process before you actually need to submit an important repair request. Also determine how management expects tenants to report urgent maintenance problems outside regular hours.
A leaking pipe at midnight requires a different response than a sticking closet door.
Confirm Move-In Logistics
Ask about permitted moving hours and whether service elevators require an advance reservation. Find out whether your moving company must provide a certificate of insurance beforehand.
Some buildings may require moving deposits, protective elevator padding, or other specific procedures. These requirements can directly affect your moving company, schedule, and overall moving costs.
Discovering building restrictions on moving morning can result in delays and unnecessary additional expenses.
Keep Your Inspection Professional
A detailed move-in inspection does not need to create an adversarial relationship with property management. Accurate documentation also benefits responsible landlords by establishing the apartment’s condition before tenancy.
Communicate clearly and professionally rather than presenting ordinary conditions in dramatic or exaggerated language. Photograph factual conditions, describe them accurately, and ask reasonable questions whenever clarification is necessary.
The objective is beginning the tenancy with both parties understanding the apartment’s actual condition.
Deciding Whether the Apartment Is Ready for Move-In
After completing your inspection, consider the apartment’s overall condition rather than focusing on isolated imperfections. Minor cosmetic defects are common, particularly inside apartments that previous tenants have already occupied.
A few documented scratches or paint marks may have little practical effect on daily living. Several unresolved safety or functional concerns deserve a very different level of attention.
Consider whether management has acknowledged identified problems and provided a credible plan for addressing them. The quality of management’s response can reveal almost as much as the defects themselves.
Every rental eventually needs maintenance, and what matters is whether problems receive appropriate attention.
Building Your Final Move-In Record
Before considering the inspection complete, make sure all your supporting documentation remains properly organized. Keep your lease, condition report, photographs, videos, repair requests, management responses, and utility information together.
Do not depend entirely on a resident portal because your access may eventually end. Save copies of important records somewhere you personally control and can access later.
Years afterward, these files may become valuable when management conducts your final move-out inspection.
Preparing for the Final Stage
At this point, you have inspected much more than the apartment’s visible cosmetic condition. You have considered pests, moisture, safety features, storage, common areas, laundry, utilities, and internet.
Package handling, building entry, amenities, and move-in procedures have also become part of your review. The remaining challenge is turning all this information into a practical rental decision.
Some defects represent harmless cosmetic history, while others deserve repair or further clarification. A few conditions may justify professional guidance before you fully accept the apartment.
Part 3 will combine these considerations through realistic scenarios, frequently asked questions, and final inspection guidance.
Real-Life Move-In Inspection Examples for Different Rental Situations
A move-in inspection becomes easier to understand when individual problems are placed in realistic situations. Some conditions simply require documentation, while others deserve immediate repair or further investigation.
These examples show why renters should evaluate the apartment as a complete living environment. Appearance matters, but functionality, safety, documentation, and management response are equally important considerations.
A Tenant Finds Scratched Hardwood Floors
Imagine a renter entering an NYC apartment and noticing several scratches across the bedroom flooring. The apartment is otherwise clean, the flooring feels stable, and the scratches appear purely cosmetic.
Management does not plan to refinish the floor before the tenant officially moves in. The renter does not necessarily need to reject the apartment because of this condition.
Instead, the tenant photographs the room, captures close-up images, and records the scratches clearly. The documentation is submitted to management as part of the move-in condition record.
Management confirms receipt, creating a written record showing the condition was reported promptly. Two years later, those records may establish that the scratches existed before occupancy began.
The important lesson is that not every existing defect requires an actual repair. Some conditions simply need accurate documentation as part of the apartment’s starting condition.
A Tenant Discovers a Plumbing Leak
Another renter turns on the kitchen faucet and notices water dripping inside the cabinet below. This condition requires a different response because an active leak can worsen quickly.
Continued leaking can damage cabinetry, flooring, personal belongings, and nearby building materials over time. The renter photographs the moisture and reports the plumbing problem to management immediately.
Instead of filling the cabinet with kitchen supplies, the tenant requests an appropriate repair. This situation demonstrates exactly why apartment fixtures should be tested carefully before move-in.
A Tenant Notices a Ceiling Stain
Consider an apartment with a light brown stain located near a bedroom window. The surface feels dry, and there is no visible evidence of an active leak.
The renter photographs the stain and asks management about the area’s previous maintenance history. Management explains that an earlier exterior leak was repaired before the tenant moved in.
The renter keeps that explanation together with the other move-in inspection documentation. If the discoloration expands later, the tenant has evidence showing previous moisture history.
Documentation creates continuity by connecting future maintenance concerns with conditions already present at move-in.
A Tenant Finds a Nonworking Appliance
A renter chooses an apartment partly because the kitchen includes a dishwasher. During the move-in inspection, the dishwasher powers on but does not appear to drain properly.
The tenant reports the issue immediately rather than waiting until regular appliance use begins. This approach is more effective than discovering the drainage problem several weeks after moving in.
The renter should also preserve any written representation showing the dishwasher was included with the rental. Features that influence a rental decision deserve verification before the tenancy fully begins.
A Tenant Finds Several Minor Cosmetic Defects
Another apartment has small wall marks, a scratched cabinet, a chipped tile, and damaged closet hardware. None of these conditions substantially affects the renter’s ability to use the apartment normally.
Instead of demanding extensive renovations, the renter documents every existing cosmetic defect clearly. The loose closet hardware is reported for maintenance, while cosmetic conditions are simply recorded.
This approach keeps the inspection practical and focused on accurate documentation rather than perfection.
A Furnished Apartment Has Missing Items
Suppose a tenant rents a furnished apartment after reviewing an inventory of provided furniture. At move-in, one chair is missing and the dining table has visible damage.
The renter photographs the damaged table and immediately reports the missing chair to management. That communication may become important if questions about the furniture later arise.
Without documentation, management could potentially believe the tenant damaged the table or removed the chair. Furnished rentals make detailed move-in records especially important because supplied property remains management’s responsibility.
Frequently Asked Questions About Apartment Move-In Inspections
Renters frequently wonder how detailed their move-in inspection actually needs to become. The safest approach is documenting conditions that could create maintenance, safety, financial, or security-deposit concerns later.
The amount of detail needed can vary depending on the apartment and its overall condition.
Should I Inspect an Apartment Before Signing the Lease?
Whenever practical, you should view the actual apartment before making your final rental commitment. A showing and a move-in inspection serve different purposes during the rental process.
The pre-lease viewing helps determine whether the apartment suits your needs and preferences. The detailed move-in inspection establishes the apartment’s condition when your tenancy officially begins.
Even if you viewed the apartment earlier, inspect it again when possession is delivered. Cleaning, repairs, or other changes may have occurred between the showing and move-in.
What if I Rented the Apartment Remotely?
Remote renters should be particularly careful because they may not have viewed the unit personally. Ask for current photographs or video of the actual apartment rather than relying on model-unit images.
Once you receive possession, complete your own move-in inspection as soon as possible. Document the apartment before unpacking extensively so important surfaces remain visible.
If something differs materially from previous representations, contact management promptly and preserve all relevant communications.
How Soon Should I Report Existing Damage?
Report existing damage as soon as reasonably possible after discovering the condition. Prompt reporting helps establish that the issue existed at the beginning of your tenancy.
Follow any formal move-in inspection deadline provided by management or property staff. Even without a stated deadline, avoid waiting weeks to report damage noticed immediately.
Prompt documentation is much more persuasive than attempting to recreate the original condition months later.
Should I Photograph Small Scratches?
Photograph defects that could reasonably be mistaken for tenant-caused damage during move-out. You do not need hundreds of photographs showing microscopic or insignificant surface imperfections.
Focus on visible scratches, dents, stains, chips, cracks, burns, and damaged hardware. Use wider photographs as well so each close-up condition has clear location context.
Is Video Better Than Photos?
Neither photographs nor video completely replaces the other during a move-in inspection. Video provides useful overall context, while photographs are easier to reference for specific conditions.
Using both formats together creates stronger and more complete move-in documentation. Keep the original files organized so they remain easy to locate years later.
What if Management Refuses to Sign My Condition Report?
Keep evidence showing that you submitted the condition report through an appropriate written channel. Preserve delivery records, email confirmations, portal submissions, or any responses provided by management.
Do not alter the original report later without also keeping the initially submitted version. The important point is establishing what you observed and when it was reported.
If a significant dispute develops later, appropriate professional guidance may become useful.
Should I Test Every Appliance?
You should reasonably test appliances supplied as part of the apartment rental. Safely test burners, the oven, refrigerator, dishwasher, and other included equipment where practical.
You do not need to perform technical diagnostics or attempt specialized appliance testing. The goal is simply determining whether supplied appliances appear to function normally.
Report unusual noises, leaks, error messages, missing components, or obvious operational problems promptly.
What if Something Cannot Be Tested Because of the Season?
Some apartment systems may be difficult to evaluate during certain times of year. Heating may not operate during summer, while cooling equipment may be difficult to test in winter.
Ask management how the system normally operates and how maintenance concerns are handled. Document any important system that could not reasonably be tested during move-in.
Once seasonal operation becomes possible, report any problems you discover as soon as practical.
Can I Refuse to Move In Because the Apartment Is Dirty?
The appropriate response depends on the severity, rental agreement, and surrounding circumstances. Minor dust differs significantly from substantial debris, sanitation problems, or abandoned belongings throughout the apartment.
Document the apartment’s condition before cleaning anything yourself or moving belongings inside. Contact management promptly and ask how the condition will be addressed.
For significant disputes about proper delivery, seek appropriate tenant guidance instead of assuming your contractual rights.
What if the Locks Do Not Work Properly?
Report any problem with the apartment’s locks or entry security immediately. A front door that does not latch or lock properly requires prompt attention.
Do not simply tolerate a security problem because other parts of the apartment appear acceptable. Avoid making unauthorized lock changes without understanding management procedures and applicable requirements.
What if I Find Evidence of Pests?
Document any visible evidence and contact management promptly before fully unpacking the apartment. Avoid diagnosing the scale of a pest problem based on one isolated sign.
Ask management about prior treatment, current conditions, and any appropriate next steps. If evidence suggests an active issue, address it before storing food or belongings.
What if I Discover a Problem After the Inspection?
Report the problem when you discover it, even after the original inspection ends. A move-in inspection reduces uncertainty but cannot reveal every hidden or seasonal issue.
A pipe may begin leaking later, or an appliance may fail after several uses. Some problems may only appear during heavy rain, cold weather, or extended occupancy.
Continue reporting maintenance concerns in writing whenever appropriate throughout your tenancy.
Complete Apartment Move-In Inspection Checklist
A systematic checklist makes it easier to inspect the property without repeatedly moving between rooms.
Use the following as a practical framework:
- Confirm that you are inspecting the exact apartment listed in the lease.
- Photograph every room before unpacking.
- Record a complete walkthrough video.
- Document existing scratches, stains, dents, cracks, and chips.
- Test the apartment entrance door and locks.
- Inspect the door frame and hardware.
- Open, close, and lock accessible windows.
- Inspect window frames for moisture or damage.
- Examine walls and ceilings for stains, cracks, or bubbling.
- Inspect floors for scratches, stains, loose boards, or damaged tiles.
- Check baseboards and room corners.
- Test accessible light switches and fixtures.
- Test accessible electrical outlets.
- Report loose or damaged electrical components.
- Understand how heating is controlled.
- Test supplied cooling equipment when practical.
- Check bathroom and kitchen ventilation.
- Inspect the refrigerator.
- Test the stove and oven safely.
- Test the dishwasher if one is supplied.
- Open kitchen cabinets and drawers.
- Check underneath the kitchen sink for moisture.
- Test hot and cold water.
- Check kitchen drainage.
- Flush the toilet.
- Test the bathroom sink.
- Run the shower or bathtub.
- Check bathroom drainage and water pressure.
- Inspect grout, caulk, and visible moisture-prone areas.
- Check bathroom ceilings and walls.
- Inspect closets and shelving.
- Look for visible pest evidence.
- Note unexplained musty, smoke, sewer, or chemical odors.
- Identify smoke and carbon monoxide alarms.
- Understand emergency exit routes.
- Inspect balconies or terraces included with the apartment.
- Verify storage areas included with the rental.
- Test building access credentials.
- Test the intercom or buzzer where possible.
- Locate elevators and stairs.
- Review moving and elevator reservation rules.
- Inspect shared laundry facilities.
- Locate trash and recycling areas.
- Verify access to advertised amenities.
- Confirm utility responsibilities.
- Verify internet provider availability if important.
- Check mobile reception.
- Understand package delivery procedures.
- Verify mailbox access.
- Compare included features with the lease.
- Document supplied furniture in furnished rentals.
- Create a written move-in condition report.
- Separate repair requests from cosmetic documentation.
- Submit important conditions to management promptly.
- Save management’s responses.
- Keep all original photos and videos.
- Store lease and move-in records somewhere you control.
The checklist may appear extensive, but most individual inspection items require only seconds. A focused review of an empty apartment can create valuable records for the tenancy.
Expert Tips for Protecting Your Security Deposit From Day One
Many renters begin thinking about their security deposit only when preparing to move out. That approach overlooks the importance of evidence created at the beginning of the tenancy.
The strongest proof concerning move-out damage often originates from move-in day documentation. Existing scratches, stains, chipped surfaces, or damaged appliances should be recorded before belongings cover them.
Create a Before-and-After Record
Treat your move-in documentation as the first half of a future apartment comparison. When moving out, photograph the property again using a similar room-by-room method.
You will then have two clear visual records showing different stages of occupancy. One record shows what you received, while the other shows what you returned.
This comparison can make later disagreements about property damage considerably easier to evaluate.
Keep Everything for the Entire Tenancy
Do not delete your move-in inspection folder after several months of living there. A tenancy may continue for years and potentially include multiple lease renewals.
By move-out, you may barely remember what certain surfaces originally looked like. Store important files somewhere durable and accessible throughout the entire rental period.
If photographs exist only on an old phone, they may disappear before becoming useful.
Report Problems Rather Than Allowing Them to Worsen
Protecting your security deposit also requires responsible communication about maintenance problems during tenancy. Suppose water begins leaking underneath the kitchen sink and remains unreported for months.
The resulting cabinet or floor damage could become significantly worse over time. Report maintenance concerns promptly and preserve written records showing when management received notice.
A clear maintenance history can help explain building-related damage during eventual move-out discussions.
Document Repairs
If management repairs an existing condition, keep a record showing what work occurred. Take an updated photograph when useful and preserve the maintenance completion notice.
This documentation creates a timeline showing how the apartment changed throughout your tenancy. It can be particularly valuable when leaks or other maintenance issues return later.
Common Move-In Inspection Mistakes to Avoid
The most common inspection mistakes usually occur because renters feel rushed during moving day. Boxes are arriving, movers are waiting, utilities need attention, and everyone wants to settle.
That pressure makes postponing documentation until tomorrow feel easy and reasonable. Unfortunately, tomorrow can quickly become next week while the original condition becomes harder to establish.
Taking Only Close-Up Photos
A close-up photograph may clearly show damage while failing to identify its exact location. Take a wider photograph first so the surrounding room or surface provides useful context.
Then capture the specific defect more closely to show its appearance and extent. This combination creates clearer documentation than isolated close-up images alone.
Documenting Problems but Never Reporting Them
Private photographs are valuable, but timely written communication can strengthen your overall documentation. If an issue matters enough to photograph, consider whether management should also receive notice.
Maintenance problems should definitely be reported so appropriate repairs can be arranged. Cosmetic conditions can be included within the move-in report to establish their existing status.
Focusing Only on Appearance
Renters naturally notice attractive finishes before thinking about less visible functional systems. A modern kitchen, large windows, or beautiful flooring can create an excellent initial impression.
However, function matters more than appearance when essential apartment systems fail. Reliable plumbing, secure locks, proper ventilation, and functioning electrical systems deserve greater attention.
Inspect the systems behind attractive finishes instead of assuming appearance guarantees proper operation.
Assuming New Means Perfect
Newly renovated apartments can still contain installation problems, incomplete work, or equipment failures. A new faucet can leak, while new flooring may already contain damaged edges.
Newly installed appliances can malfunction despite appearing unused or recently purchased. Inspect renovated apartments with the same care you would apply to older rentals.
Ignoring Small Water Signs
A small ceiling stain may be old and harmless, but it may indicate recurring moisture. Document the condition and ask management about its known history.
Water-related concerns deserve attention because minor visible signs can sometimes reflect larger underlying problems. Understanding the source helps determine whether additional investigation or maintenance is necessary.
Making Repairs Without Permission
Renters sometimes attempt immediate repairs because they want the apartment ready for occupancy. Avoid unauthorized electrical, plumbing, gas, structural, lock, or installed-appliance work.
Report the issue instead and allow management to arrange appropriate qualified assistance. Improper repairs can cause additional damage and make responsibility much harder to determine.
Relying on Verbal Promises
A leasing representative may genuinely intend to arrange a promised repair after move-in. However, people forget details, employees change, and management departments may communicate differently.
Confirm important repair commitments in writing so expectations remain clear for everyone involved. A short written confirmation can prevent significant misunderstandings later during your tenancy.
What to Do if the Apartment Is Not in the Promised Condition
Sometimes a move-in inspection reveals conditions that extend beyond ordinary cosmetic wear. The apartment may differ materially from what you expected based on previous representations.
A promised appliance could be missing, repairs may remain unfinished, or substantial debris could remain. Serious maintenance concerns may also appear despite the apartment looking acceptable during earlier viewings.
Document the condition thoroughly before modifying, cleaning, or attempting repairs yourself.
Compare the Problem With Your Written Agreement
Review your lease, applicable riders, and relevant written communications before drawing conclusions. Determine specifically what was promised and how the actual apartment differs from those representations.
Listing photographs and advertisements can provide context, but contractual documents deserve particular attention. Separate genuine discrepancies from assumptions that were never confirmed within the written agreement.
Understanding the documentation helps you communicate the problem more accurately and effectively.
Contact Management Promptly
Describe the condition specifically and include photographs whenever visual documentation helps explain the issue. State clearly what you expected and what you actually found during move-in.
Avoid vague statements claiming the entire apartment is simply unacceptable without identifying specific concerns. A message explaining that an included dishwasher is missing gives management something concrete to address.
Ask for a Clear Repair Plan
When management acknowledges an issue, ask what steps will happen next and when. Find out who will perform the work and whether apartment access must be arranged.
Ask whether significant repairs are expected before or after your planned move-in date. For important conditions, written clarity provides a more reliable record than vague verbal assurances.
Do not assume someone will handle the issue without understanding the actual repair plan.
Be Careful About Making Major Decisions Without Guidance
A serious apartment problem may understandably make a renter consider immediately walking away. However, contractual rights can depend on the specific facts and applicable legal requirements.
Do not make high-stakes decisions about occupancy, termination, or withholding money based solely on internet advice. For major safety, habitability, or lease disputes, seek current official guidance or qualified assistance.
When to Seek Official Guidance or Professional Help
Most ordinary move-in issues can be resolved through routine communication with building management. A loose cabinet handle or malfunctioning dishwasher generally does not require legal intervention.
More serious situations may deserve specialized professional or official attention depending on their nature. Examples include major water intrusion, electrical hazards, serious security problems, or significant pest activity.
Essential-service failures or substantial differences between promised and delivered conditions may also justify additional guidance. Professional help may become appropriate when the dispute involves considerable money or tenancy rights.
The correct resource depends on the specific problem requiring evaluation or resolution. Electrical hazards need qualified electricians, while specialized plumbing problems should be handled by plumbers.
Legal or tenant-assistance resources may be appropriate when contractual rights become disputed. You do not need to become the inspector, contractor, and attorney yourself.
Your role is identifying concerns, documenting them accurately, reporting them, and seeking specialized help when appropriate.
Final Advice Before Accepting Any Rental Property
Enter the apartment with a clear inspection plan rather than immediately beginning the unpacking process. Give yourself time to inspect the empty space while important surfaces remain fully visible.
Start at the entrance and move systematically through each room instead of inspecting randomly. Test important apartment features rather than assuming they work because they appear intact.
Turn on faucets, flush toilets, open windows, lock doors, and operate supplied appliances. Check outlets, inspect ceilings, look beneath sinks, open cabinets, and visit common areas.
Verify advertised amenities and important building features before completely accepting their availability or condition. Then document everything using wide photographs, detailed images, and a complete walkthrough video.
Write down conditions that photographs cannot show clearly, such as sounds or functional problems. Separate cosmetic history from actual maintenance issues and communicate important concerns promptly.
Keep your communication factual and professional instead of presenting the inspection as an accusation. A detailed move-in report simply creates clarity about the apartment’s starting condition.
Most importantly, preserve those records throughout your entire tenancy rather than deleting them later. Your inspection may feel less important after several months of normal apartment living.
Years later, those records can become extremely valuable when security-deposit questions eventually arise.
Conclusion
Accepting a rental property involves more than receiving keys and moving furniture inside. The apartment’s beginning condition establishes an important baseline for everything that follows afterward.
A thorough move-in inspection helps you understand exactly what property and conditions you are accepting. It can reveal maintenance concerns, existing damage, and important features that may not function correctly.
It also creates documentation that may protect you when your tenancy eventually ends. Begin by inspecting the apartment’s basic structure and all clearly visible surfaces.
Check doors, locks, windows, walls, ceilings, flooring, baseboards, and other important areas. Look for visible damage, previous moisture signs, and anything that appears unusual.
Then test the systems you will rely on throughout normal daily apartment living. Lights, outlets, heating, cooling, plumbing, drainage, ventilation, and appliances require actual functional testing.
A feature that appears completely normal may behave very differently when you use it. Kitchens and bathrooms deserve particular attention because they combine multiple important systems within small spaces.
Check underneath sinks, run water, test drainage, and carefully inspect cabinets and fixtures. Review showers, tubs, toilets, caulking, plumbing connections, and moisture-prone bathroom areas.
Continue beyond the most obvious living spaces during your complete move-in inspection. Closets can reveal moisture, while window frames may show evidence of earlier leaks.
Balconies introduce doors, drainage, safety considerations, and additional maintenance responsibilities for renters. Storage areas may also be less accessible or private than listing descriptions suggested.
The building itself also plays an important role in your overall rental experience. Inspect entrances, elevators, stairways, laundry facilities, trash areas, package systems, and mailboxes.
Verify how residents actually access and use these features rather than trusting marketing descriptions. Shared amenities should also be confirmed directly before you rely on their availability.
Utilities deserve the same level of careful attention before your full move-in. Know what rent includes and which utility accounts you must establish yourself.
Verify internet availability when remote work or other activities depend heavily on reliable service. Check mobile reception and understand how the apartment’s heating and cooling systems operate.
Then compare everything observed against your lease and other written rental representations. The actual apartment matters more than model units or attractive listing photographs.
Documentation connects every part of the inspection into one reliable and useful record. Take photographs before furniture arrives and record a complete walkthrough video.
Create written notes for conditions that remain difficult to capture clearly through photographs. Preserve original files and submit important concerns to management as soon as practical.
A properly documented scratched floor may never require another discussion during your tenancy. The same undocumented scratch could become a security-deposit disagreement several years later.
Not every defect discovered during inspection actually needs to be repaired immediately. This distinction is important for keeping the inspection practical and appropriately focused.
Cosmetic wear can often simply be documented, while functional problems should be properly reported. Safety, security, water, electrical, heating, and similar serious concerns deserve prompt attention.
Prioritization helps keep the move-in inspection reasonable rather than unnecessarily overwhelming for everyone. An apartment does not need to appear completely new to be a good rental.
Previously occupied homes naturally contain signs of earlier everyday residential use and normal aging. The goal is not finding absolute perfection before deciding to accept the property.
Instead, understand what you are accepting and confirm that essential systems function appropriately. Establish a reliable record of existing conditions before your personal belongings cover important surfaces.
Keep that documentation with you throughout the entire duration of your tenancy. Preserve the lease, move-in report, photographs, videos, maintenance requests, and repair confirmations.
Store important correspondence and inspection records somewhere you personally control and can access later. When move-out eventually arrives, create a similar second set of photographs.
The comparison between move-in and move-out records can become extremely valuable during final accounting. A strong inspection can also improve your everyday experience throughout the tenancy.
Problems discovered before unpacking are often much easier for maintenance workers to access. You avoid placing kitchen belongings underneath a sink that is already leaking.
You also avoid discovering appliance problems only after beginning normal daily household use. Most importantly, you avoid learning too late that your entrance door does not lock properly.
A move-in inspection changes your role from passive recipient into an informed and prepared renter. Take enough time to look carefully and test the apartment’s important features.
Ask reasonable questions whenever something appears unusual or does not make sense. Document what you discover and report conditions that genuinely require attention from management.
Then preserve your evidence throughout the tenancy so it remains available when needed. A careful inspection at the beginning can prevent future confusion, inconvenience, and security-deposit disputes.