
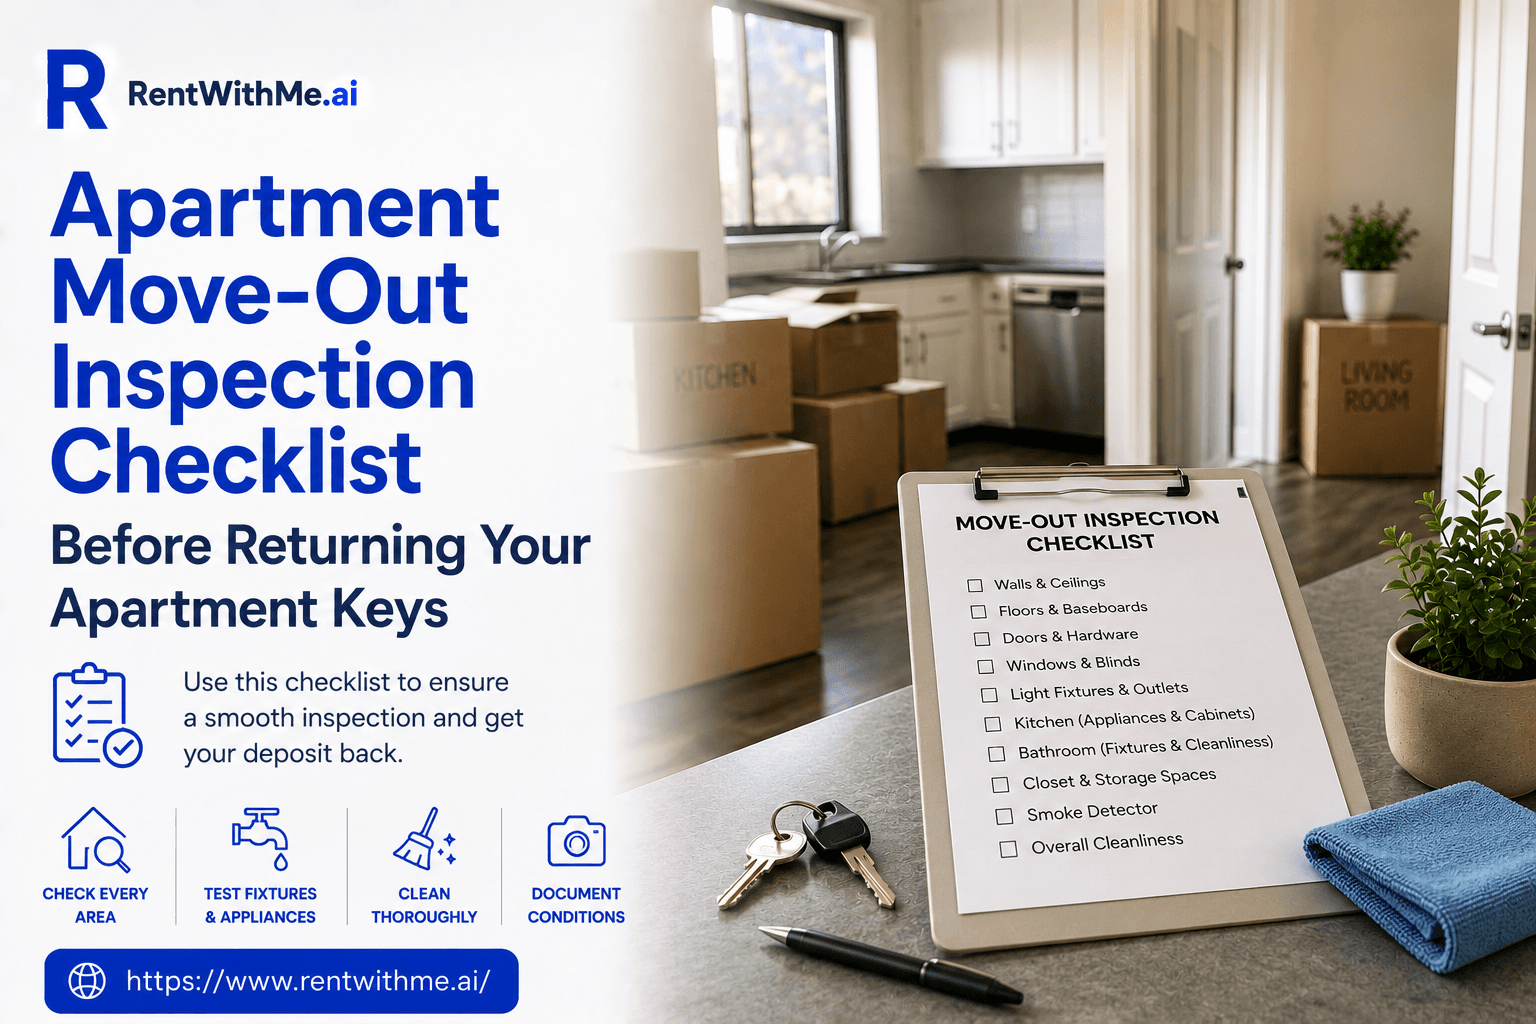
Apartment Move-Out Inspection Checklist Before Returning Your Apartment Keys
Introduction
Moving out of an apartment can feel deceptively simple. Pack the boxes, hire movers, clean the rooms, hand over the keys, and move on.
In reality, the final condition of the apartment can have a direct effect on your security deposit, your relationship with management, and whether any disputes arise after you leave. A careful move-out inspection gives you one last opportunity to identify problems, correct what you reasonably can, and create evidence showing how the apartment looked when you surrendered possession.
For New York City renters, this process is especially important because apartments can have years of normal wear, older finishes, prior repairs, and conditions that existed before the current tenancy began. Without a clear comparison between move-in and move-out, disagreements over scratches, stains, walls, appliances, or fixtures can become much harder to resolve.
A move-out inspection is not about trying to make an older apartment look brand new. It is about returning the property in appropriate condition, removing your belongings, addressing tenant-caused issues where reasonable, and documenting everything before access ends.
The strongest approach begins before moving day itself. Review the lease, locate your original move-in records, create a room-by-room plan, and give yourself enough time to handle the apartment methodically rather than rushing through it after the movers leave.

Why a Move-Out Inspection Matters Before You Hand Over the Keys
Once you return the keys, your ability to enter the apartment may end immediately. That makes the final inspection your last practical opportunity to review the unit before management receives it.
If a closet still contains boxes, a refrigerator shelf is missing, or a bathroom fixture shows visible damage, you should know before surrendering possession. Identifying these issues beforehand gives you a final opportunity to address anything that reasonably requires attention.
The inspection also helps you distinguish ordinary cosmetic wear from more significant property damage. A floor naturally aged through years of normal occupancy should be viewed differently from one damaged through misuse.
The same principle applies to walls, appliances, doors, countertops, flooring, and bathroom fixtures. Review each condition carefully and decide whether it reflects normal use or reasonably requires attention before leaving.
Think of the Move-Out Inspection as the Other Half of Your Move-In Record
If you documented the apartment when you moved in, now is the time to review those records. Open your original photographs and compare them carefully with the apartment’s current condition.
Review the move-in condition report and any maintenance emails concerning leaks, damaged flooring, appliance problems, cracked tiles, or similar issues. These records can help establish whether certain conditions existed before or developed during your tenancy.
Then compare those earlier records directly with the apartment as it appears during move-out. This before-and-after approach is much more reliable than trying to remember how everything looked several years earlier.
Memory can become unreliable during a long tenancy, especially when small changes occur gradually. Photographs, reports, and written maintenance records provide a much stronger reference for comparing property conditions.

Check Whether Management Offers a Pre-Move-Out Inspection
In some tenancies, renters may be allowed to request an inspection before the tenancy officially ends. This can help identify potential deductions while enough time remains to address reasonable concerns.
If this type of pre-move-out inspection applies to your rental, consider using the opportunity. It may reveal issues that would otherwise appear only after your security deposit has been reduced.
The inspection may identify cleaning concerns, tenant-caused damage, or belongings that management expects removed. Its value comes from giving you enough time to respond before finally surrendering the apartment.
Compare Move-In Condition With Current Apartment Condition
Go room by room and compare the apartment carefully with your original move-in documentation. If the bedroom floor already had scratches, confirm whether those same marks remain unchanged.
If the kitchen counter had a chip, compare its current condition with your earlier photographs. If a bathroom tile was already cracked, make sure the original evidence remains available.
The goal is to separate conditions that existed at move-in from those developed during tenancy. This distinction can become especially important if a security deposit dispute arises later.

Pay Attention to Repairs Completed During the Tenancy
The apartment may have changed because management repaired or replaced certain items during your tenancy. These updates can naturally make the property look different from its original move-in condition.
For example, a leaking faucet may have been replaced, or a damaged refrigerator exchanged. A wall may also have been repaired following a plumbing leak or similar maintenance issue.
Keep records of these repairs because they provide useful context about changes within the apartment. They can explain why certain areas no longer look exactly as they did initially.
A maintenance history can also demonstrate that certain damage resulted from existing building conditions. This documentation may help distinguish maintenance-related problems from issues caused directly by tenant behavior.
Understanding Normal Wear and Tear Versus Tenant-Caused Damage
One important move-out concept is understanding the difference between ordinary wear and tenant-caused damage. Apartments naturally age over time as residents use rooms, surfaces, fixtures, and other features.
Paint may gradually dull, floors may show ordinary foot traffic, and fixtures can naturally wear. These conditions differ from substantial damage resulting from misuse, neglect, accidents, or improper treatment.
A tenant should not assume that every visible imperfection requires repair at personal expense. However, obvious tenant-caused damage should not be ignored simply because the apartment was previously occupied.

Examples of Normal Wear
Examples of normal wear can include ordinary carpet wear, light wall scuffs, minor fading, or routine surface aging. These conditions commonly develop gradually as tenants use and occupy an apartment normally.
The exact distinction depends on the specific circumstances, including the item’s age and original condition. A small mark on a five-year-old floor differs from a deep gouge caused by dragging heavy furniture.
Consider whether the condition resulted from reasonable everyday use or something beyond ordinary occupancy. This distinction can help determine whether an issue represents expected wear or actual tenant-caused damage.
Examples of Tenant-Caused Damage
More significant issues may include large holes, broken doors, missing fixtures, substantial stains, or burns. Damage can also include appliances harmed through misuse or physical deterioration extending beyond ordinary household use.
If you caused this type of damage, determine whether it can be repaired appropriately before moving out. Do not attempt complicated repairs simply because you are trying to avoid a possible deduction.
Poorly completed repairs can sometimes make the original problem more difficult or expensive to correct. For plumbing, electrical systems, installed appliances, or structural components, coordinating with management is generally safer.
Age and Prior Condition Matter
Suppose a carpet was already several years old when you originally moved into the apartment. It may naturally show additional wear by the time you eventually move out.
That does not mean a tenant should automatically be charged as though new carpeting was destroyed. Similarly, an older appliance failing through normal use differs from one damaged through tenant misuse.
Keep the item’s age and previous condition in mind when evaluating any potential move-out deductions. This is one important reason why detailed move-in photographs can become especially valuable later.

Creating a Room-by-Room Move-Out Plan
A room-by-room plan makes the final inspection easier to organize and manage efficiently. Instead of cleaning randomly, assign specific move-out tasks to each area of the apartment.
Start with rooms that are already mostly empty and require little additional daily use. Then continue toward the kitchen, bathroom, and other spaces needed until the final day.
For each room, think in four categories:
- Remove all belongings.
- Clean appropriate surfaces.
- Check for tenant-caused damage.
- Photograph final condition.
This simple framework keeps the move-out process organized without making the overall project unnecessarily complicated. Following the same approach in every room also makes it easier to track progress.
Begin Decluttering Before the Final Week
Do not wait until moving day to decide which belongings you plan to take. Furniture, clothing, boxes, old electronics, kitchenware, and miscellaneous possessions can require considerable time to sort.
Items left behind can delay the turnover process and potentially create additional move-out charges. Begin early by selling, donating, recycling, or properly disposing of unwanted belongings before the final inspection.
The less clutter remaining during the final days, the easier the apartment becomes to inspect. A clearer space also makes cleaning, checking for damage, and documenting final conditions more manageable.

Cleaning Walls, Floors, Windows, and General Living Areas
General living areas usually require the most straightforward cleaning during the final move-out process. Remove dust from accessible surfaces, then vacuum or sweep floors and mop where appropriate.
Clean obvious marks that can be removed safely without damaging paint, flooring, or finishes. Avoid aggressive chemicals unless you know they are suitable for the specific surface being cleaned.
A careless attempt to remove a small mark can create larger stains or discoloration. Focus on reasonable cleaning rather than attempting to refinish or restore apartment surfaces yourself.
Inspect Walls After Furniture Is Removed
Furniture can hide significant wall areas that remain difficult to inspect during normal occupancy. Once sofas, beds, bookshelves, and televisions are removed, carefully inspect all previously covered surfaces.
Look for holes, marks, damaged paint, adhesive residue, and other visible wall conditions. If you mounted items during the tenancy, review your lease and any approval previously received.
Determine whether management expects you to remove installed hardware or restore affected wall areas. Do not assume that filling every hole yourself is automatically the appropriate approach.
Some buildings prefer to handle these repairs consistently as part of their normal turnover process. Following established move-out instructions can prevent unnecessary repairs that potentially create additional wall damage.
Remove Adhesives Carefully
Hooks, tape, stickers, and mounting strips can damage painted surfaces when removed too aggressively. Take your time and follow the product’s removal instructions whenever those directions remain available.
If removing adhesive begins lifting the wall finish, stop before causing additional visible damage. Consider whether continuing the removal process could make a relatively minor condition significantly worse.
Document the affected area clearly before deciding how the remaining adhesive should be handled. A minor management repair may be preferable to a larger patch caused by unsuccessful removal.

Check Flooring After Everything Is Gone
Vacuuming or sweeping improves appearance while also revealing the actual condition of exposed flooring. Once dust and debris are removed, inspect for scratches, stains, cracks, or loose materials.
Compare any visible defects with your original move-in records whenever those documents remain available. Take final photographs from wide angles and closer distances where additional detail may be useful.
Do not place rugs, boxes, or other belongings over questionable areas before management receives possession. Clear documentation and transparency are safer than unintentionally creating questions about concealed flooring conditions.
Clean Windows Without Causing Damage
If window cleaning is part of your routine, reasonably clean accessible interior glass and surrounding areas. Avoid leaning outside windows or attempting unsafe exterior cleaning simply to improve their appearance.
Safety matters more than making every window pane completely spotless before returning the apartment. Check accessible window locks and hardware while completing the final inspection of each window.
If a window was damaged during your tenancy, confirm that management has already received notice. Avoid surprising management with an unresolved window problem during the final apartment handover process.
Inspecting the Kitchen Before Move-Out
Kitchens usually require detailed cleaning because food, grease, appliances, and stored items accumulate gradually. Begin by removing everything from cabinets, drawers, refrigerator shelves, and pantry storage areas.
Check each storage area carefully because forgotten food or belongings can create additional cleaning work. Once everything is empty, wipe appropriate surfaces and remove obvious crumbs or sticky residue.
Clean the Refrigerator Thoroughly
Empty the refrigerator and freezer completely, making sure that no food remains inside either compartment. Wipe shelves, drawers, door seals, and other accessible interior surfaces using appropriate cleaning products.
If removable shelves or bins belong to the refrigerator, return them to their proper locations. Do not discard refrigerator components simply because they appear worn after years of normal use.
If any shelf or component is cracked or missing, clearly document its condition before leaving. This provides a useful record of the appliance’s condition when you return the apartment.
Defrost Only When Appropriate
Do not automatically unplug or defrost the refrigerator unless management specifically instructs you beforehand. Leaving an unplugged appliance with closed doors can potentially create unpleasant odors or moisture problems.
If you are uncertain about the correct procedure, ask management about its preferred move-out process. Buildings may follow different appliance procedures, so following instructions is safer than improvising yourself.
Clean the Oven and Stove
Remove ordinary grease, food residue, crumbs, and other visible debris from cooking surfaces and appliances. Wipe burners, grates, controls, and accessible areas using products appropriate for their specific finishes.
Avoid abrasive products that could scratch or otherwise damage appliance surfaces during the cleaning process. If using a self-cleaning function, follow manufacturer instructions and exercise reasonable care throughout operation.
A heavily soiled appliance may naturally require more attention than one receiving limited everyday use. The objective is reasonable cleanliness rather than unnecessarily disassembling the appliance during move-out cleaning.
Check Every Burner and Appliance Component
Before leaving, confirm that burner caps, racks, trays, knobs, and removable components remain present. Small appliance parts can disappear during packing when someone mistakenly assumes they belong to tenants.
Compare the kitchen with your original move-in photographs whenever you are uncertain about supplied components. The same principle applies to refrigerator shelves, dishwasher racks, microwave components, and similar items.
Anything originally supplied with the apartment should remain unless management specifically instructs you otherwise. Keeping landlord-owned components together helps prevent unnecessary questions during the final move-out inspection.
Inspect Cabinets and Drawers
Empty every cabinet and drawer completely, then carefully check corners for overlooked belongings or debris. Wipe loose crumbs, spills, and stains while making sure doors and drawers operate normally.
If hardware became loose during your tenancy, consider whether a routine maintenance request is appropriate. Also inspect underneath the sink for any active leaks, moisture, or other visible problems.
Check Plumbing One More Time
Run the kitchen faucet briefly, inspect underneath the sink, and check whether drainage works normally. If you discover an active leak during move-out, report the problem to management immediately.
Do not ignore a plumbing problem simply because you are preparing to leave the apartment. Water damage can worsen quickly and create uncertainty about when the original problem first developed.
A written repair report submitted before surrendering possession provides useful documentation for everyone involved. It also demonstrates that you reported the issue promptly after discovering the visible problem.
Inspecting the Bathroom Before Move-Out
Bathrooms naturally collect soap residue, moisture, dust, and mineral buildup throughout ordinary daily household use. Clean the sink, toilet, tub, shower, mirror, and accessible fixtures to a reasonable standard.
Remove personal products completely and carefully inspect cabinets or medicine storage for forgotten belongings. After cleaning, check for damaged caulk, cracked tiles, or other conditions requiring documentation.
Clean Grout and Caulk Carefully
Ordinary surface cleaning is appropriate for grout and caulk during your final bathroom preparation. Avoid removing or replacing caulk unless you understand the process and management expects this work.
An inexperienced repair can create additional problems and potentially make existing waterproofing conditions considerably worse. If grout or caulk deteriorated through age or recurring moisture issues, document its condition clearly.
If unusual damage resulted from tenant behavior, discuss the issue directly with property management beforehand. A rushed repair can sometimes create more problems than the original condition you intended to fix.
Check Shower and Tub Drainage
Run water briefly and confirm that the shower or bathtub drains at a reasonable rate. If drainage is significantly slow or completely blocked, report the problem before returning possession.
Avoid harsh drain chemicals unless you know that building management permits their safe use. Plumbing systems can be sensitive, particularly in older properties with aging pipes or infrastructure.
A maintenance request is generally safer than attempting an aggressive solution without understanding the system. Reporting the problem also creates documentation showing when you noticed the drainage issue.
Inspect the Toilet
Flush the toilet once and confirm that it stops running normally after completing the cycle. Check around the base for leaks, visible moisture, movement, or other signs of problems.
If the toilet rocks, leaks, or continues running, notify management before leaving the apartment. Reporting the issue helps establish that you did not knowingly leave an active problem undisclosed.
Remove Personal Bathroom Hardware
Remove your shower curtain, bath mats, shelving, organizers, and accessories unless management originally supplied them. Be careful when removing adhesive accessories because aggressive removal can damage surrounding wall finishes.
Check whether any holes, marks, or other visible damage remains after removing your personal hardware. If management approved a permanent installation, confirm whether that installation should remain after move-out.
Do not accidentally remove landlord-owned fixtures while clearing personal belongings from the bathroom before leaving. When uncertain about ownership, review your records or ask management before removing the item.
Checking Bedrooms and Closets
Bedrooms may appear finished after furniture is removed, but they still require careful final inspection. Look behind former bed and dresser locations while checking floors, walls, outlets, and windows.
Closets are particularly easy to overlook during the final stages of packing and moving. Remove hangers, boxes, storage containers, and smaller belongings from shelves, corners, and upper areas.
Vacuum or sweep the closet floor and inspect shelving for anything accidentally left behind. The apartment should be completely empty unless management has explicitly approved another arrangement beforehand.
Inspect Closet Hardware
Inspect closet rods, shelves, doors, tracks, and other hardware for visible damage or problems. A shelf damaged through overloading may reasonably require attention before the apartment is finally surrendered.
If a door was already misaligned at move-in, your original records can support that condition. Document the current appearance because small hardware disputes are easier with clear photographic evidence.
Check Doors and Door Hardware
Open and close bedroom, closet, bathroom, and other interior doors during your final inspection. Look for holes, dents, damaged knobs, loose hardware, or other visible conditions requiring attention.
Make sure landlord-owned doorstops, handles, and other supplied fixtures remain inside the apartment. If you installed personal locks or hardware with permission, determine whether restoration is required.
Do not remove existing hardware simply because you mistakenly assume that it belongs to you. When ownership is uncertain, compare move-in records or confirm the correct procedure with management.
Inspect Built-In Storage
Built-in shelves, cabinets, wardrobes, and similar permanent storage features belong to the rental property. Remove your belongings while leaving all supplied hardware, shelves, brackets, and components properly in place.
Wipe obvious dust and debris, and return adjustable shelving to a reasonable configuration when practical. Do not discard unused shelves or brackets because those components may still belong to management.
Checking Entry Areas and Hallways
Entryways often collect forgotten belongings, wall marks, and debris during the moving process itself. Remove shoes, umbrellas, personal mats, coat hooks, and any small storage furniture you own.
Check walls near the entrance because moving large furniture can create fresh scuffs or damage. Inspect the entrance door and lock hardware again after movers have finished removing larger belongings.
A final inspection after major furniture leaves helps identify damage caused during the moving process. This timing gives you an opportunity to document new conditions before surrendering the apartment.
Watch for Move-Out Damage Caused by Movers
Movers can accidentally scrape walls, damage elevators, chip door frames, or scratch apartment flooring. Do not assume the apartment’s condition remains unchanged after furniture and boxes have been removed.
Walk through every area again after the moving company completes its work and leaves. If new damage occurred, photograph and document the condition immediately while details remain clear.
If movers caused the damage, review your moving agreement and communicate appropriately with management. Waiting until after returning the keys can make the situation more difficult to address.
Common Move-Out Problems Tenants Often Miss
Several recurring issues create problems because renters notice them only after surrendering apartment access. Forgotten personal property is one of the most common examples during rushed move-out preparations.
Check upper shelves, freezer drawers, medicine cabinets, balconies, storage cages, and utility closets carefully. Another common problem involves landlord-owned property that has been misplaced during the tenancy.
Window screens, appliance racks, keys, remotes, and shelving may have been stored somewhere else. Return everything belonging to the apartment before completing the final handover with property management.
Forgotten Items Behind Appliances or Furniture
Small belongings can remain hidden behind refrigerators, radiators, doors, or freestanding pieces of furniture. Avoid moving heavy installed appliances yourself when doing so could create unnecessary safety risks.
Once your furniture is removed, inspect accessible spaces behind doors, underneath sinks, and inside corners. A final ten-minute sweep can prevent management from needing to remove forgotten property afterward.
Unremoved Wall Mounts
Television brackets, shelves, hooks, anchors, and other mounted hardware are frequently overlooked during move-out. Determine whether these items belong to you and whether your lease requires their removal.
Do not automatically pull secure hardware from walls because removal can create additional visible damage. Review written approvals and move-out instructions before deciding how mounted items should be handled.
When uncertain, asking management may be safer than creating larger holes through unnecessary removal. Clear instructions can help you avoid turning a minor issue into a significant repair.
Lost Keys or Access Devices
Tenants sometimes discover during final handover that a mailbox key or access remote is missing. Search for these items early because replacement devices may sometimes involve additional charges.
Create a list of everything management originally provided when you first received apartment access. Apartment keys, mailbox keys, fobs, remotes, parking passes, storage keys, and amenity cards may require return.
Leaving Food or Cleaning Products Behind
Renters sometimes assume future tenants will appreciate unused food, cleaning products, or household supplies. Management may instead consider these belongings abandoned property requiring removal before the next occupancy.
Unless management specifically authorizes leaving these items, remove them before surrendering the apartment completely. The same principle applies to paint cans, spare furniture, chemicals, and other leftover possessions.
If your building has specific disposal requirements for certain materials, follow those instructions carefully. Proper disposal prevents unnecessary cleanup concerns and helps leave the apartment ready for turnover.
Forgetting Separate Storage Areas
If your lease includes a basement locker, bike storage area, garage space, or another separate location, inspect it before surrendering possession.
These spaces are especially easy to overlook during a busy and demanding move. Remove all belongings, return access keys, and confirm that nothing personal remains behind.
Take photographs when the area is part of your rented space and its final condition could later become relevant.
Do Not Overrepair the Apartment
Some renters become so concerned about their security deposit that they spend significant money repairing ordinary wear.
That can be unnecessary and may create additional costs that provide little practical benefit. Do not repaint the entire apartment, replace fixtures, or refinish floors unless required by the lease or management.
You may spend more than any reasonable deduction would have cost in the first place. Worse, unauthorized repair work can create new problems or damage.
The goal is returning the apartment in appropriate condition, not completing a personal renovation project before leaving.
Focus on What You Can Control
You can remove your belongings, clean reasonably, document conditions, and report active maintenance problems. You can also address minor tenant-caused issues when doing so is safe and appropriate.
You cannot reverse several years of normal aging throughout the apartment. Do not let security-deposit anxiety turn reasonable move-out preparation into unnecessary construction work.
Focus your attention on practical tasks that are actually within your control before surrendering possession.
Prepare the Apartment for the Final Inspection
Once the apartment is empty and cleaned, stop packing and shift completely into inspection mode. Begin at the front door and move slowly through each room.
Look carefully at ceilings, walls, floors, windows, appliances, closets, fixtures, and other supplied features. Test essential plumbing where appropriate and confirm that lights and supplied equipment remain in place.
Then take your final photographs and video showing the condition in which you are actually surrendering possession.
Keep the Apartment Empty During Final Documentation
Do not take final move-out photographs while boxes or moving supplies still cover significant portions of the flooring.
An image showing an empty room provides much stronger and clearer documentation. You want the floors, walls, fixtures, appliances, and built-in features fully visible.
If temporary moving supplies remain, remove them before creating your final photographic record. This also reduces the risk of accidentally leaving belongings after documentation is completed.
Do Not Return Keys Before Finishing Your Evidence
This is one of the simplest but most important rules during the final move-out process. Once your keys are returned, you may no longer have access to the apartment.
Do not plan to return later for photographs, cleaning, or additional inspection work. Finish cleaning, inspect everything, document conditions, remove all property, and only then surrender possession.
If management requires a scheduled handover, allow enough time beforehand to complete these tasks calmly and carefully.
Preparing for the Final Stage of Move-Out
By the time Part 1 is complete, the apartment should be nearly ready for surrender. You have reviewed the lease, compared conditions, cleaned major rooms, and checked commonly forgotten areas.
You have also inspected the kitchen and bathroom, emptied closets, identified damage, and reviewed the apartment’s overall condition.
The remaining steps are equally important and involve final documentation, inspections, utilities, building procedures, access devices, and your security deposit.
Part 2 will focus on those administrative and documentation steps so the physical move and legal surrender happen as cleanly as possible.
Requesting and Preparing for a Pre-Move-Out Inspection
A pre-move-out inspection can be one of the most useful opportunities available before surrendering an apartment. It allows management to identify conditions that could potentially lead to deductions.
If your tenancy includes the right to request this inspection, avoid waiting until the final day. The process works best when the apartment is mostly packed but still accessible for legitimate corrections.
Bring your move-in records if they remain easy to access during the inspection. A condition management considers new may already appear in your original photographs or move-in report.
Having those records available can help resolve misunderstandings before they develop into security-deposit disputes.
Ask How the Inspection Process Works
Different properties may follow different procedures when scheduling and conducting pre-move-out inspections. Some landlords provide written notices explaining inspection rights and available appointment windows.
Others may require tenants to contact management directly and arrange a suitable time. Confirm the inspection date, time, attendance expectations, and any written follow-up procedures.
Also ask whether management will provide a written list identifying conditions that may result in deductions. The most useful inspection creates an actionable record rather than only a verbal discussion.
Attend the Inspection When Possible
Being present allows you to see exactly what management identifies during the inspection. If a representative points out grease inside the oven, you immediately know what requires additional cleaning.
If management identifies a damaged cabinet, you can compare that condition with your move-in documentation. This can prevent tenants and landlords from discussing entirely different conditions later.
The inspection also gives you an opportunity to ask whether an issue is only documented or requires corrective action before move-out.
Keep the Inspection Focused
Do not turn the inspection into an argument over every small mark or cosmetic issue. Listen carefully to what management identifies and ask reasonable questions when clarification is necessary.
Take useful notes so you remember which conditions were discussed during the inspection. If you disagree with something, calmly document the disagreement and preserve evidence supporting your position.
The objective is not to win the inspection or challenge every observation. It is to understand what management expects while you still have time to respond appropriately.
How to Handle Repairs Identified Before Final Move-Out
After the inspection, separate identified concerns into clear categories based on the type of work required. Some conditions may involve cleaning, while others may involve minor tenant-caused damage.
A few issues may require professional maintenance rather than something you should address yourself. This classification matters because every condition should not be handled using the same approach.
You may be able to clean a stained appliance yourself without difficulty. A damaged electrical outlet should not become a do-it-yourself project simply because moving day is approaching.
Address Simple Cleaning Issues Promptly
Cleaning is often the easiest category to resolve after management identifies a concern. If residue remains inside a refrigerator, oven, cabinet, or appliance, address it before the final move-out.
Take photographs afterward so you have a record showing the condition was corrected. This documentation can demonstrate that you responded before possession was returned.
Do not wait until the final hour because cleaning tasks can take longer than expected. Empty apartments often reveal additional surfaces and areas that require attention.
Handle Minor Tenant-Caused Damage Carefully
Some minor issues may be straightforward enough to address without professional assistance. Personal adhesive material, removable hooks, or another small problem you clearly caused may be simple to correct.
Still, avoid repairs that could create more damage than the original condition. A poor wall patch can look worse than the small hole it was intended to fix.
If you are uncertain whether management prefers handling the issue directly, ask first. Written confirmation can prevent unnecessary spending on work the landlord did not want performed.
Let Professionals Handle Specialized Repairs
Plumbing, electrical, gas, structural, appliance, and similar repairs should generally be handled by qualified professionals. If the inspection identifies one of these issues, communicate directly with management.
Do not attempt a last-minute repair after watching a short online tutorial. The apartment remains the landlord’s property, and unauthorized work can create safety problems.
Improvised repairs may also increase the amount of damage rather than resolving it. A documented professional repair is generally safer than an uncertain do-it-yourself solution.
Deciding What You Should Fix Yourself and What Management Should Handle
A useful rule is asking whether the issue involves ordinary cleaning or personal property. Building systems and installed fixtures generally require a different level of attention.
Removing your belongings is your responsibility, and cleaning a dirty shelf is usually reasonable. Replacing damaged wiring or modifying plumbing is not an appropriate tenant move-out task.
If a faucet leaks because of normal wear or a building maintenance problem, report it. If you damaged a removable personal accessory, that is a different situation.
Do Not Spend Heavily Without Understanding the Benefit
Renters sometimes panic before move-out and begin paying for repairs that were never necessary. Before replacing anything expensive, ask management what they actually expect you to address.
You could spend hundreds of dollars on something the landlord planned to repair differently. You might also replace an older item even though only a small portion was damaged.
Move-out decisions should remain practical and based on actual expectations rather than fear. Understand the likely benefit before committing significant money to repair work.
Removing Furniture, Trash, and Personal Belongings Completely
An apartment is not fully ready for surrender while your personal property remains anywhere inside. This includes furniture, boxes, clothing, household goods, and smaller overlooked belongings.
Check closets, drawers, cabinets, storage rooms, and outdoor areas before considering removal complete. Plan one final sweep after the primary moving process has finished.
Large unwanted items should be handled according to building procedures and applicable local disposal requirements. Do not assume unwanted furniture can simply be left beside the building’s trash area.
Improper disposal can create additional work and may potentially result in extra charges.
Check Every Storage Location
Open every cabinet, drawer, closet, and storage area before you permanently leave the apartment. Check upper shelves, freezer compartments, medicine cabinets, and other easily overlooked locations.
Review balcony corners, basement storage, bike areas, and garage spaces where those areas apply. Smaller items are especially easy to forget during the final stages of moving.
A few forgotten belongings may seem insignificant, but management still must remove them before turnover. A systematic inspection helps ensure the property is completely empty.
Do Not Leave Items “For the Next Tenant”
Unless management explicitly approves it, remove every item that belongs to you before surrendering possession. A lamp, chair, shelf, mattress, or cleaning supplies may seem potentially useful.
The next tenant may not want those items, and management may treat them as abandoned property. If you genuinely want to leave something behind, ask management beforehand.
Written approval removes uncertainty and confirms that the item can remain in the apartment.
Documenting the Final Apartment Condition With Photos and Video
Final documentation should happen only after the apartment has been completely emptied and cleaned. This moment best represents the condition in which you are actually returning the property.
Take wide photographs of every room, then document specific areas that could become disputed later. Pay attention to walls, flooring, appliances, countertops, bathrooms, closets, windows, and built-in fixtures.
If a preexisting condition remains visible, photograph it again for comparison. Your move-in and move-out images can then provide a direct before-and-after record.
Record a Slow Final Walkthrough
A walkthrough video can provide useful context that still photographs may not fully capture. Begin at the entrance and move slowly through every room in sequence.
Show walls, ceilings, floors, windows, appliances, closets, and installed fixtures clearly. Avoid rushing because fast movements can make important details difficult to review later.
The goal is reliable documentation rather than producing a polished or cinematic video. A slow and steady recording is far more useful than a quick pan.
Capture the Date When Possible
Your phone will usually preserve metadata showing when photographs and videos were originally created. Keep the original files instead of relying only on edited copies or screenshots.
You can also send a final-condition email to yourself or management with photographs attached. This creates another dated record showing when the documentation was prepared.
Original files are generally easier to organize and verify if questions arise later.
Photograph Areas Management Identified Earlier
If the pre-move-out inspection identified specific issues, photograph those areas again after addressing them. For example, photograph the cleaned oven, emptied storage area, or corrected minor wall condition.
These after-photographs provide a direct record showing that the identified issue received attention before surrender. They can also help demonstrate the final condition if questions later arise.
Handling Utilities Before Move-Out
Utilities should end according to your actual occupancy timeline rather than only the moving date. If electricity, gas, or another service remains in your name, choose the termination date carefully.
You may still need lights and power while cleaning, inspecting, or preparing the apartment for handover. Shutting service off too early can make final move-out tasks unnecessarily difficult.
It can also interfere with appliances, elevators, or other parts of the move-out process. Schedule service termination after your final access period unless management provides different instructions.
Take Final Meter Information When Relevant
When you have direct utility responsibility and access to relevant billing information, keep final service records. You do not need to perform unsafe or unauthorized inspections of utility meters.
Simply retain the final statement and service termination confirmation provided by the utility company. These records can help if questions later arise about end-of-tenancy utility charges.
Coordinate Gas Carefully
If your apartment uses gas service, do not attempt to shut off building gas lines yourself. Follow the procedures provided by management and the authorized utility provider.
The same principle applies to installed appliances connected with building gas service. Do not disconnect equipment unless the work is clearly your responsibility and properly authorized.
Safety matters more than personally completing every move-out task without professional assistance.
Managing Internet and Cable Service
Internet and cable services often involve equipment that belongs to the provider rather than the tenant. Routers, modems, cable boxes, remotes, and related devices may require return.
Follow the provider’s instructions, return required equipment, and keep the receipt or confirmation. Unreturned equipment can create charges that continue after you have already moved.
If the provider needs apartment access, schedule the appointment before you return the keys. Do not promise technician access after you have already surrendered possession.
Parking, Storage, and Separate Building Services
A complete move-out can involve more than simply clearing the apartment itself. If you rented parking, storage, a bike locker, or another building service, confirm when those rights end.
Empty every separate storage area, remove vehicles as required, and return related access devices. Parking passes, garage remotes, storage keys, and similar items may all need to be returned.
Take photographs of separate rented areas when their final condition could later become relevant. A clean apartment does not complete the move-out if your belongings remain elsewhere on the property.
Coordinating Elevators, Movers, and Building Procedures
Many NYC buildings maintain specific move-out procedures that tenants and moving companies must follow. You may need an elevator reservation, insurance documentation, or approved moving hours.
Ask about these requirements well before your move rather than assuming access will be automatic. A moving company arriving without required paperwork can cause delays and additional costs.
Building procedures are not a minor last-minute detail because they directly affect the move. Include them as a standard part of your overall move-out planning.
Confirm the Elevator Reservation
If the building uses a service elevator, confirm your reservation shortly before the scheduled move. Do not assume the time remains secured simply because you arranged it several weeks earlier.
Ask whether protective padding or any other setup is handled by building staff. Build some additional time into your schedule because apartment moves often take longer than expected.
A rushed moving process creates greater risk of damage to apartments and shared building areas.
Protect Common Areas During the Move
Depending on your agreements and circumstances, you may be responsible for damage caused during moving. Make sure movers handle elevators, doors, walls, floors, and shared areas carefully.
If damage occurs, photograph and document it immediately instead of waiting for management to discover it. If the mover caused the damage, review your contract and any applicable insurance arrangements.
Clear documentation can help establish what happened and when the damage occurred.
Conduct a Post-Mover Inspection
Do not complete your final apartment inspection before the moving company finishes removing everything. Large furniture can scrape walls, damage floors, or affect doors and elevator entrances.
Once the apartment is completely empty, walk through every area again carefully. Pay particular attention to door frames, corners, flooring near entrances, and walls along moving paths.
If you discover fresh damage, address and document it before surrendering possession when practical. This additional inspection can prevent unexpected problems after the keys are returned.
Final Cleaning After Movers Leave
Even if you cleaned before moving day, movers may leave dust, packaging material, or other debris. Complete one final sweep or vacuum after the apartment is fully emptied.
Safely wipe any new marks that can be removed without damaging apartment surfaces. Confirm once again that all cabinets, closets, and storage areas remain completely empty.
Check the entry area last because moving activity commonly leaves dust and debris there. Final cleaning should happen immediately before your photographs and key return.
This ensures your documentation accurately shows the apartment as management actually receives it.
Returning Keys, Fobs, Remotes, and Other Access Devices
Keys and access devices provide clear evidence that a tenant has surrendered possession of the property. Make a complete list of everything that must be returned before move-out.
Apartment keys, mailbox keys, building keys, electronic fobs, garage remotes, parking passes, storage keys, and amenity cards may all apply.
Do not assume management remembers exactly what you originally received when the tenancy began. Review your lease or move-in records if they contain a list of issued access devices.
Return everything using the official process established by property management.
Get Proof of Key Return
Ask for written confirmation, a receipt, or another form of evidence when practical. If you return keys through a management office, note the date and approximate time.
Do not leave keys somewhere informally unless management specifically instructs you to do so. Clear documentation helps establish when you officially surrendered possession of the apartment.
That date can become important for security-deposit timing and other final accounting matters.
Do Not Keep a Spare Key
Keeping a spare key may seem harmless, but it serves no purpose after tenancy ends. Return or handle all access devices according to management’s specific move-out instructions.
Keeping an unauthorized copy can create uncertainty about whether possession was fully surrendered. The cleanest move-out occurs when all access rights clearly end at the same time.
Forwarding Address and Final Contact Information
Management needs a reliable address for sending your security deposit, itemized statements, or other final correspondence. Provide your forwarding address clearly and in writing before or during final handover.
If you are temporarily staying elsewhere, use an address where important mail will reach you safely. You can update that forwarding information later if your circumstances change.
Also provide a current phone number and email address when management may lose access through the tenant portal. Do not assume the contact details listed in your original lease remain current.
Preserve Your Tenant Portal Records
Many renters lose access to online resident portals shortly after their tenancy officially ends. Before that happens, download and save any records you may reasonably need later.
Preserve leases, payment histories, maintenance requests, inspection reports, notices, invoices, and important communications. Screenshots can help, but downloadable documents often provide a clearer and more complete record.
Create your own organized archive instead of depending on future access to the landlord’s system. This can become especially important if a security-deposit or billing dispute appears later.
Review the Final Rent Ledger
Before leaving, confirm whether management’s records show any outstanding balance connected to your tenancy. Review rent, landlord-billed utilities, parking, storage, and any other building services carefully.
If you believe an amount is incorrect, raise the issue before moving out whenever possible. A clean and accurate financial ledger can make the final security deposit accounting easier.
Keep clear evidence of every final payment made before ending the tenancy. Do not pay an unexplained balance simply to close the account without understanding the charge.
Questions to Ask Management Before Surrendering Possession
Before handing over the keys, confirm the remaining process and any outstanding responsibilities with management. Asking these questions can prevent uncertainty after you have permanently surrendered possession.
Useful questions can include:
- Has the final move-out inspection been completed?
- Are there any unresolved conditions management expects me to address?
- Is my rent account current?
- Have all required keys and access devices been returned?
- Do you have my correct forwarding address?
- Is there a specific security deposit return process I should expect?
- Is there any additional move-out documentation I need to provide?
- How will I receive the final itemized accounting if deductions are made?
These questions are practical rather than confrontational and help clarify the remaining move-out responsibilities. They create a clear understanding of what, if anything, still needs attention after departure.
Ask About Outstanding Maintenance Issues
If there is a building-related maintenance issue you previously reported, mention it again before leaving. For example, an unresolved leak or appliance problem should remain documented as an existing maintenance matter.
You are not responsible for personally repairing building systems that require professional maintenance or management attention. The goal is ensuring management understands conditions that could otherwise be misunderstood after your departure.
Final Walkthrough Before Key Return
Complete one final walkthrough carrying only your phone and move-out checklist before returning the keys. Begin at the entrance and carefully move through every room, closet, cabinet, and storage area.
Check behind doors, underneath sinks, inside the refrigerator and freezer, and throughout the bathroom. Inspect balconies, storage areas, and other spaces while confirming that all personal belongings are gone.
Then take your final photographs and walkthrough video showing the apartment’s actual condition. Only after completing this final record should you surrender the keys to management.
Preserve Move-Out Records in One Folder
Create one move-out folder containing everything relevant to the conclusion of your tenancy. Include your lease, departure notice, move-in photographs, move-out photographs, inspection paperwork, and final rent ledger.
Also preserve maintenance records, utility confirmations, key-return proof, forwarding-address notices, and security deposit correspondence. Organize these documents by date so important information remains easy to locate later.
This folder becomes your primary reference if management contacts you after the move. It also prevents stressful searches through old devices or emails when questions about deductions arise.
Do Not Delete Records After the Deposit Arrives
Even after receiving your security deposit, review the returned amount and final accounting carefully. Make sure the payment matches the accounting and any deductions include the required explanation.
Keep your records until you are confident that every financial matter involving the tenancy is resolved. There is little benefit in immediately deleting important files related to your move-out.
Digital storage is inexpensive, while reconstructing missing photographs, documents, and correspondence can be extremely difficult later.
How to Handle a Disagreement During the Final Inspection
If management identifies something you believe is preexisting or ordinary wear, remain calm during discussions. Show relevant move-in documentation and clearly explain why you disagree with the identified condition.
Ask that your disagreement be documented, especially when photographs or previous records support your position. You do not need to convince everyone immediately while completing the final walkthrough.
Written records and photographs may ultimately prove more useful than an argument at the door. Keep the discussion factual because the inspection should establish condition rather than create personal conflict.
What if Management Refuses to Inspect Before Key Return?
If management refuses to conduct an inspection before key return, create comprehensive documentation yourself. Take detailed photographs and video showing every room and relevant feature before surrendering possession.
Send written notice confirming that the apartment has been vacated according to the agreed process. Preserve communications showing that you attempted to coordinate an inspection with management before leaving.
The absence of a joint walkthrough should not prevent you from creating your own record. Your independent documentation becomes especially important when management does not inspect the apartment with you.
What if You Discover Damage on the Final Day?
If you discover damage on the final day, do not attempt to hide it. Photograph the condition clearly and notify management before you surrender possession of the apartment.
If the issue is minor and safely repairable, ask whether management wants it addressed. If professional work is required, allow management to determine the appropriate repair process.
A transparent final-day report is better than allowing damage to be discovered without explanation later. Trying to conceal the problem can make a straightforward issue considerably harder to resolve.
What if Movers Cause Common-Area Damage?
Report any common-area damage immediately to both building management and the moving company. Photograph the affected area and preserve the mover’s contract, insurance information, and relevant communications.
Do not assume the building will automatically pursue the moving company instead of contacting you. Your lease or moving agreement may influence responsibility for damage occurring during the move.
Prompt documentation makes it much easier to establish what happened and when the damage occurred.
Protecting Your Security Deposit Through Documentation
Every major step in the move-out process supports the same goal of creating a fair record. Your security deposit should reflect legitimate obligations and actual damage rather than assumptions or unreliable memories.
A complete move-out record makes it easier to question or challenge an unsupported deduction later. Your strongest evidence generally comes from three important stages throughout the rental relationship.
First, document what the apartment looked like when you originally moved into the property. Second, preserve what management identified during any inspection conducted before your final move-out.
Third, document exactly how the apartment looked immediately before you surrendered possession to management. Together, these records provide a clear and complete account of the tenancy.
Preparing for the Final Stage
At this point, the apartment itself should be empty, reasonably cleaned, inspected, and thoroughly documented. The administrative side of your move-out process should also be nearly complete.
Utilities should be scheduled appropriately, while mover and elevator procedures should already be completed. Keys and access devices should be accounted for, and your forwarding address should be provided.
Important records should also be saved somewhere you can access after leaving the property. The final stage focuses on what happens after the keys permanently leave your hands.
Part 3 will cover realistic inspection examples, frequently asked questions, security deposit protection, and common mistakes. It will also explain later damage claims and final steps for closing a tenancy confidently.
Real-Life Move-Out Inspection Examples for Different Tenant Situations
Move-out rules become easier to understand when they are considered through realistic tenant situations. Similar visible wear can produce different outcomes depending on prior conditions and available documentation.
What existed at move-in, what happened during the tenancy, and final apartment condition all matter. The following scenarios show how preparation, communication, and evidence can influence the move-out process.
A Tenant With Ordinary Floor Wear
Consider a renter who has lived in the same apartment for several years. The hardwood flooring shows minor surface marks but no deep gouges, burns, stains, or broken boards.
The renter reviews move-in photographs showing that the flooring was already used rather than newly installed. Final photographs show clean, empty flooring with ordinary signs of continued residential use.
Instead of refinishing the entire floor, the renter cleans it appropriately and documents its condition. This avoids unnecessary DIY work while preserving evidence showing how the flooring looked at surrender.
A Tenant Who Accidentally Damaged a Wall
Another renter mounted a television and created additional wall damage while removing the mounting bracket. The tenant does not hide the problem behind furniture or attempt an inexperienced rushed repair.
Instead, the tenant photographs the condition and discusses it with management before final surrender. Management can explain whether the tenant should address it or leave repairs for building turnover.
This approach does not automatically eliminate a potential charge related to the wall damage. However, it reduces uncertainty and helps prevent a straightforward repair from becoming a larger dispute.
A Tenant With Preexisting Bathroom Damage
Suppose a bathroom tile was already cracked when the renter originally moved into the apartment. The tenant documented the crack in the condition report and photographed it during move-in.
Several years later, that same crack remains visible during the renter’s final move-out inspection. Management initially questions it, but the renter provides documentation showing the condition predates the tenancy.
This situation demonstrates why move-in records should remain available until the rental relationship is completely finished.
A Tenant Who Leaves Furniture Behind
A renter finishes moving but leaves an old mattress, desk, and broken shelving behind. Disposing of these unwanted belongings would have required additional effort before surrendering the apartment.
From the renter’s perspective, the apartment may appear almost completely empty after the move. From management’s perspective, removal work is still necessary before turnover can be completed.
The better approach is arranging lawful disposal before surrender or receiving explicit management approval beforehand. An unwanted item does not automatically become management’s responsibility because the tenant no longer wants it.
A Tenant Whose Movers Damage the Entryway
Another renter carefully prepares the apartment, but movers scratch the entryway while removing a large sofa. The renter notices the new damage while conducting the required post-mover walkthrough.
Instead of immediately returning the keys, the renter photographs the damage and contacts the moving company. Management is also informed, and the renter preserves the mover’s contract and applicable insurance documentation.
Discovering the problem before key return creates a clearer record of when the damage occurred.
A Tenant With an Unresolved Building Leak
Suppose a tenant reported water intrusion around a bedroom window several times during the tenancy. Management completed repairs, but visible staining still remains when the renter eventually moves out.
The renter preserves maintenance requests, earlier leak photographs, and final photographs showing the remaining discoloration. These records distinguish a documented building issue from unexplained damage discovered only after departure.
Move-out evidence becomes considerably stronger when supported by records created throughout the entire tenancy.
Frequently Asked Questions About Apartment Move-Out Inspections
Tenants frequently have questions about the condition expected before apartment keys are finally returned. There is no single cleaning or repair formula applying identically to every rental situation.
The lease, apartment condition, applicable law, tenancy type, and specific circumstances can all matter. Understanding these factors helps renters approach their final inspection more carefully and realistically.
Should I Take Photos Before Moving Out?
Yes, thorough final photographs are among the most useful move-out records you can create. Photograph the apartment after removing belongings and completing all reasonable cleaning before returning possession.
Include wide photographs of every room and closer images of important surfaces, appliances, and fixtures. Also document any existing conditions that could potentially become questions after your final departure.
A walkthrough video can provide useful additional context beyond individual photographs of the property. Keep original files rather than relying only on compressed copies shared through messaging applications.
When Should I Take My Final Photos?
Take your final photographs as close as practical to the actual surrender of possession. Ideally, movers have finished, rooms are empty, cleaning is complete, and no additional work remains.
Photographs taken several days earlier become less useful if movers later damage flooring or doorways. Your final documentation should accurately represent the condition management actually receives when you surrender possession.
Should I Photograph an Apartment That Looks Perfectly Fine?
Yes, because move-out documentation is useful even when no visible damage appears anywhere. Photographs showing clean floors, empty closets, intact appliances, countertops, and walls can provide valuable evidence.
Evidence showing good overall condition can be equally important as photographs documenting preexisting defects. A complete photographic record provides clearer context if management later questions a particular area.
Do I Need Professional Cleaning?
Not necessarily, because professional cleaning requirements depend on your lease and apartment condition. Applicable requirements and the specific circumstances of your tenancy may also influence what cleaning is necessary.
Do not automatically assume an expensive cleaning company is required simply because your tenancy is ending. Focus on returning the apartment in the condition appropriately required under your tenancy terms.
Should I Repaint Before Moving Out?
Do not automatically repaint the apartment simply because you are preparing to move out. Painting requirements can depend on lease terms, approved changes, occupancy length, and existing wall conditions.
If you changed the wall color, review any agreement concerning restoration before completing additional work. If walls show ordinary aging, repainting the entire apartment may not actually be necessary.
Ask management before spending substantial money or performing work that may not be required.
Should I Patch Nail Holes?
The appropriate approach depends on the extent of the holes and management’s expectations. A few ordinary picture-hanging marks differ significantly from substantial damage caused by large mounting hardware.
Before attempting repairs, consider whether your work will genuinely improve the existing wall condition. Poor patching can create a larger area requiring additional professional preparation during building turnover.
When uncertain, ask management how it prefers the condition to be handled before repairing anything.
What Happens if I Forget Something in the Apartment?
Contact management immediately if you discover that personal property remains after surrendering possession. Do not assume you can simply reenter the apartment after returning your keys.
Once possession has been surrendered, any additional access may require direct approval from management. This is why completing a final empty-apartment inspection before departure remains extremely important.
Check closets, cabinets, freezer compartments, bathroom storage, balconies, and separate storage spaces before leaving permanently.
Should I Leave Cleaning Supplies for Management?
Do not leave cleaning supplies behind unless management specifically agrees that they can remain. Products that seem useful to you may simply become abandoned property requiring removal.
Take all personal belongings, including partially used cleaning products, paint, tools, hangers, and household supplies. Written management approval should be obtained before intentionally leaving anything behind inside the apartment.
What Should I Do With Keys and Fobs?
Return every access device using the specific process established by building management. This can include apartment, building, mailbox, storage, and other physical keys issued during tenancy.
Electronic fobs, garage remotes, amenity credentials, and parking access devices may also require return. Obtain evidence confirming the return whenever doing so is practical and reasonably available.
A receipt, email, or signed acknowledgment can establish when possession was officially surrendered.
Should I Turn Off Electricity Before My Final Inspection?
Generally, keeping essential service available during final cleaning and inspection can be helpful. Working lights allow you to inspect closets, walls, appliances, flooring, and other areas clearly.
Coordinate utility termination with your actual surrender date instead of automatically ending service when movers arrive. Follow management and provider instructions that apply specifically to your apartment and utility account.
What if Management Finds Damage After I Return the Keys?
Ask management for specific information about any damage identified after you surrendered possession. Find out what condition is claimed, where it appears, and what amount is associated.
Then compare the claim against your move-in records, maintenance history, inspection paperwork, and final photographs. A detailed evidence-based response is generally more useful than simply stating that you disagree.
What if the Damage Was Already There?
Locate the original evidence showing that the disputed condition existed before your tenancy began. Move-in photographs, videos, condition reports, emails, and maintenance requests can provide important supporting documentation.
These records may also show that damage resulted from a previously reported building maintenance problem. Maintaining records throughout the tenancy becomes particularly valuable when questions arise after move-out.
Do not rely only on memory when clear documentation can demonstrate the earlier condition.
Complete Apartment Move-Out Inspection Checklist
The final inspection should be systematic enough to prevent discovering forgotten responsibilities after surrendering possession. Use this checklist as a practical framework for completing the final move-out process:
- Review the lease and applicable move-out instructions.
- Confirm your final possession and key-return dates.
- Review move-in photographs and the original condition report.
- Gather relevant maintenance records.
- Request any applicable pre-move-out inspection.
- Document conditions identified during that inspection.
- Address appropriate cleaning concerns.
- Report specialized repairs rather than attempting unsafe work.
- Remove all furniture and personal belongings.
- Empty kitchen cabinets and drawers.
- Remove all food from the refrigerator and freezer.
- Clean supplied kitchen appliances reasonably.
- Confirm appliance shelves, racks, and components remain.
- Check underneath the kitchen sink.
- Clean bathroom fixtures and storage areas.
- Empty bedroom and hallway closets.
- Remove belongings from balconies or terraces.
- Empty any separate storage areas.
- Remove personal items from parking or garage spaces.
- Check walls after furniture and mounts are removed.
- Inspect flooring after movers leave.
- Check door frames and moving paths for new damage.
- Complete final sweeping, vacuuming, or other reasonable cleaning.
- Photograph every empty room.
- Photograph important appliances and fixtures.
- Record a final walkthrough video.
- Preserve original photo and video files.
- Download records from your resident portal.
- Save the final rent ledger and payment confirmations.
- Coordinate utility termination.
- Return internet or cable equipment where required.
- Return apartment and building keys.
- Return mailbox and storage keys.
- Return electronic fobs, remotes, and parking credentials.
- Obtain proof of key or access-device return when possible.
- Provide your forwarding address in writing.
- Keep current contact information available to management.
- Save inspection paperwork and management correspondence.
- Confirm that no belongings remain anywhere on the property.
- Keep all move-out documentation after surrender.
The checklist should support your inspection rather than become a rushed box-ticking exercise. Move methodically through the property and confirm each item according to your specific tenancy.
Expert Tips for Protecting Your Security Deposit Before Key Return
Security deposit protection begins earlier, but the final days offer another opportunity to strengthen documentation. The most valuable strategy involves directly comparing records from different stages of the tenancy.
Place your move-in and move-out evidence together so specific conditions can be compared clearly. If the same floor scratch appears in both photographs, that comparison provides much stronger evidence.
If management repairs changed a condition during tenancy, include relevant maintenance records within your documentation. Those records can explain why something appears different between your move-in and move-out photographs.
Build a Simple Evidence Timeline
Organize important events chronologically so the complete tenancy history remains easy to understand. Record move-in, original inspection, major maintenance issues, move-out notice, and any pre-move-out inspection.
Also include your moving date, final photography, and key-return date within the same timeline. This record does not need to become a complicated or overly detailed legal file.
A simple folder containing clearly named documents can make the history understandable to anyone reviewing it.
Keep Communication in Writing
Phone conversations can resolve issues quickly, but important move-out matters should have written documentation. If management identifies a repair, send a brief written confirmation describing what was discussed.
If you provide a forwarding address, submit that information clearly in writing as well. When returning keys, preserve written acknowledgment whenever management provides one through its normal process.
Written records reduce uncertainty about important dates, responsibilities, agreements, and completed move-out actions.
Photograph Cleanliness, Not Just Damage
Renters often photograph every visible scratch while forgetting to document the apartment’s overall cleanliness. Take wide photographs showing empty, reasonably clean rooms before you finally surrender possession.
Photograph the refrigerator interior and show that cabinets and closets have been completely emptied. Capture the kitchen and bathroom clearly so their final overall condition remains properly documented.
These photographs help demonstrate how the property actually looked when possession was returned.
Save Evidence Outside the Tenant Portal
Do not assume your resident portal or online account will remain accessible after move-out. Download important records before your tenancy officially ends and save them somewhere you control.
Preserve your lease, payment history, maintenance tickets, inspection reports, notices, and important management messages. Personal storage ensures your evidence remains available if portal access disappears after your tenancy ends.
Common Move-Out Inspection Mistakes to Avoid
The final days of a tenancy create pressure, and that pressure can cause avoidable mistakes. One of the biggest mistakes is waiting until the final hours to inspect everything.
By then, movers may be waiting while management expects the keys to be returned. You may have little remaining time to correct even simple cleaning or documentation problems.
Begin early enough that your final day focuses primarily on verification rather than major repairs or cleaning.
Returning Keys Before Taking Photos
Returning the keys before taking photographs is a mistake that can be difficult to correct. Once your access ends, management may not permit reentry simply for forgotten documentation.
Complete every photograph, video, and final inspection before you permanently surrender possession. Treat returning the keys as the final step rather than something completed midway through move-out.
Photographing Rooms Full of Boxes
Boxes can hide floors, walls, baseboards, outlets, closets, and other important apartment features. Your final photographic record becomes considerably stronger when the rooms are completely empty.
Whenever possible, wait until movers finish before creating your final apartment documentation. This timing also captures any damage that may have occurred while furniture was being removed.
Overlooking Separate Storage
An empty apartment does not complete your move-out if belongings remain in separate storage areas. Include every rented or assigned area when creating your final inspection and removal plan.
Parking spaces, storage cages, terraces, bicycle areas, and other assigned spaces should be reviewed carefully. Return any keys, remotes, passes, or other access devices associated with those spaces.
Throwing Away Move-In Records Too Early
Your original move-in records become particularly valuable when you are preparing to move out. Do not delete those photographs or reports simply because the tenancy is ending.
Keep them together with your final move-out documentation until every financial matter has been fully resolved. The beginning and ending conditions are most useful when they can be compared directly.
Making Unnecessary Repairs
Fear of losing a security deposit can cause renters to complete unnecessary or expensive repairs. Do not replace items simply because they appear old after years of normal residential use.
Do not refinish flooring for ordinary wear or repaint without confirming that such work is required. Spend money only when there is a reasonable and clearly understood basis for doing so.
Ignoring Active Maintenance Problems Because You Are Leaving
An active leak or maintenance issue still matters even when your tenancy ends tomorrow. Report unresolved problems and document their condition before you permanently leave the apartment.
Management needs to know about issues that could worsen after possession has been returned. A final written maintenance report can also demonstrate that the problem was not intentionally hidden.
What to Do if Management Claims Damage After You Leave
Receiving a damage claim after move-out can be frustrating when you believed everything was returned appropriately. Avoid responding based only on emotion and begin by identifying exactly what management claims.
Ask for itemized information and any supporting documentation that applies to the particular situation. Then compare every claimed condition carefully against the records you preserved during your tenancy.
Review the Claim One Item at a Time
Suppose management identifies three separate issues when completing its final accounting after your departure. One issue may be legitimate, another may represent ordinary wear, and another may be preexisting.
Review each claimed condition individually rather than treating every deduction as one combined dispute. Accepting responsibility for one condition does not require accepting every other deduction management identifies.
Likewise, disputing one charge does not automatically mean every other deduction is improper. A precise, item-by-item response is generally stronger than issuing one broad rejection.
Compare Photographs Directly
Locate your move-in photograph showing the specific area involved in the disputed condition. Then compare that image directly with the corresponding photograph taken immediately before your move-out.
If the condition existed originally, identify that fact clearly using the supporting photographic evidence. If it resulted from maintenance problems, include relevant work orders, messages, or management emails.
If your final photographs do not show the claimed damage, preserve the originals and explain what they depict.
Request Clarification About Costs
If a deduction appears unusually high, ask what work occurred and how costs were calculated. Evaluate the charge in the context of the actual condition and any applicable requirements.
Avoid assuming every invoice is automatically reasonable or that every deduction is necessarily improper. Instead, focus on the facts and available records relating directly to the disputed condition.
Age, prior condition, damage severity, and actual work performed may all provide relevant context.
Keep Your Response Professional
You may strongly disagree with management, but a clear written response remains more useful. Identify the specific charge, explain your disagreement, and attach relevant documentation supporting your position.
Clearly state the resolution you are requesting rather than sending an emotional or unclear response. This makes the issue easier for others to understand if the disagreement continues.
Understanding Security Deposit Timing in New York
NYC renters should understand the security deposit rules that apply to their particular tenancy. For many New York residential tenancies, state law establishes requirements regarding deductions and security deposit returns.
Because rent regulation and individual tenancy circumstances can affect the analysis, verify currently applicable requirements. Avoid relying entirely on outdated blog posts, informal advice, or information applying to different tenancy types.
Keep clear evidence showing your actual vacancy date and when you returned the keys. These dates may become important when determining whether required security deposit timelines were followed.
Your Key-Return Evidence Matters
Imagine your lease ends on the final day of the month, but you move earlier. Which date matters for a specific legal or financial question can depend on the circumstances.
A clear record showing when possession was actually surrendered can eliminate unnecessary uncertainty later. Keep receipts, emails, management acknowledgments, or other records confirming when the final handover occurred.
Pair this evidence with your final photographs, move-out documentation, and written forwarding-address notice.
When to Seek Official Guidance or Professional Help
Many move-out disagreements can be resolved directly with management through clear and respectful communication. A clear photograph or an earlier maintenance record may settle the issue without further action.
Some disputes, however, may require additional guidance when the circumstances become more complicated. Consider appropriate official or professional help when a substantial security deposit is withheld or significant damage is disputed.
Additional guidance may also help when legal responsibilities are unclear or tenancy rules are uncertain. Rent-regulated apartments can involve additional considerations that deserve current and authoritative information.
For NYC rental questions involving significant money or legal rights, rely on appropriate current resources. New York State, New York City, or qualified tenant counsel may provide more reliable guidance.
Know When a Contractor’s Opinion May Help
Not every move-out disagreement involves legal responsibilities or the interpretation of tenancy requirements. Sometimes, the central disagreement concerns what actually caused physical damage within the apartment.
A plumber, electrician, flooring specialist, or another qualified professional may help clarify complicated physical conditions. Their expertise may distinguish ordinary equipment failure or deterioration from damage caused through misuse.
Professional evaluation generally becomes more worthwhile when the disputed amount is financially significant. Commissioning an expensive expert assessment usually makes little sense for a relatively minor cosmetic disagreement.
Keep your response proportional to the seriousness, complexity, and financial value of the disputed issue.
Final Advice Before Returning Your Apartment Keys
Treat returning the apartment keys as the final step in your entire move-out process. Every other important responsibility should already be completed before you officially surrender possession.
Your belongings should be removed, and the apartment should already be reasonably cleaned throughout. Relevant repairs and maintenance concerns should also be appropriately addressed, reported, or clearly documented.
Your final photographs and video should be complete before you permanently leave the apartment. Separate storage spaces should be emptied, and utility arrangements should already be properly coordinated.
Your forwarding address should be submitted, and important tenant portal records should be downloaded. Only after completing these responsibilities should you return keys and other required access devices.
Before leaving for the final time, stand near the entrance and complete one visual sweep. Look carefully throughout the apartment and confirm that no personal belongings or important items remain.
Open the final closet, check the refrigerator, and inspect all remaining bathroom storage areas. Confirm that you photographed every condition and area you intended to document before leaving.
Then surrender possession through the agreed procedure and preserve evidence confirming when it occurred.
Conclusion
Moving out successfully requires more than packing your belongings and returning your apartment keys. The final inspection provides an important opportunity to establish exactly how the apartment was returned.
It also allows you to address reasonable concerns before access ends and preserve useful documentation. That documentation can protect your position if questions or disagreements arise after you leave.
Preparation should begin well before the moving truck arrives at your apartment building. Review your lease, move-out requirements, original move-in photographs, and relevant maintenance records carefully.
Understand the building’s moving procedures and schedule any applicable inspection sufficiently early before departure. This provides enough time to respond appropriately if legitimate concerns are identified before surrender.
Then evaluate the apartment carefully, moving through each room in a systematic and organized way. Clean appropriate surfaces without damaging finishes, and completely empty all cabinets, closets, and storage areas.
Remove remaining food, check supplied appliances, and inspect bathrooms and plumbing for visible problems. Review walls and flooring carefully after furniture and other large belongings have been completely removed.
Remember that the objective is not making an occupied apartment appear completely newly constructed again. Ordinary residential use naturally affects flooring, paint, fixtures, appliances, and other surfaces over time.
The important distinction involves reasonable wear, preexisting conditions, building maintenance issues, and tenant-caused damage. Your documentation can help make these important differences much clearer if questions later arise.
Move-in photographs establish the apartment’s condition when your tenancy originally began at the property. Maintenance communications explain relevant problems, repairs, and other conditions that occurred during your occupancy.
Pre-move-out inspection records show what management identified before you finally surrendered the apartment. Final photographs demonstrate the property’s condition immediately before possession was officially returned to management.
Together, these records provide a much stronger and more reliable history than memory alone.
Do not overlook important administrative details while concentrating primarily on cleaning and physical moving tasks. Utilities, internet equipment, parking credentials, storage areas, mailbox keys, and electronic fobs require attention.
Building access devices are also part of the move-out process and should be properly returned. A forgotten garage remote or occupied storage locker can complicate an otherwise organized departure.
Your final apartment documentation should be completed after the movers have finished removing everything. Large furniture can scratch flooring, damage door frames, or leave marks during the moving process.
Inspect the apartment again after it becomes empty and complete any necessary final cleaning. Photograph every room clearly and record a slow walkthrough video showing the apartment’s final condition.
Preserve the original photographs and video files somewhere secure and easily accessible after moving. Do not return your keys first while assuming you can simply come back afterward.
Once possession has been surrendered, your legal or practical access to the apartment may end. The strongest final record is created while you still have legitimate access to the property.
Provide management with an accurate forwarding address and your current contact information before departure. Save your rent ledger, payment confirmations, inspection documents, maintenance history, and key-return evidence securely.
Store these records somewhere outside the tenant portal where you can access them afterward. Keep everything until the tenancy and final security deposit accounting have been completely resolved.
If management later claims damage, carefully review each individual item rather than responding broadly. Compare every claim with your records and separate legitimate concerns from conditions you reasonably dispute.
Respond using clear facts and supporting documentation rather than frustration or emotional assumptions about responsibility. When substantial money or complicated legal questions are involved, seek appropriate current professional guidance.
A well-managed move-out should leave very little uncertainty about your final responsibilities and documentation. You should know the apartment’s condition, what you returned, and exactly when possession ended.
You should also know where your supporting photographs, records, confirmations, and other documentation are securely stored. That level of preparation can make your transition into the next home considerably easier.
The final hours inside an apartment may seem insignificant compared with years spent living there. Financially and practically, however, those final hours can become some of the most important.
Inspect carefully, document thoroughly, communicate clearly, and complete every necessary move-out responsibility before leaving. Return your apartment keys only after confirming that the entire move-out process is truly complete.